Actions
- Working With Actions
- Create & Assign Actions
- What are Actions?
- View Actions
- Edit, Update, Archive, or Delete an Action
- Communication with Actions
- Permissions & Participants in Actions
- How Actions Flow Between GCs and Subs
- Action Types
Working With Actions
Create & Assign Actions
Summary
This tutorial guides you through creating and assigning actions in BuilderPal, such as scheduled work or other task types. Actions help organize tasks, assign responsibilities, and keep projects on track by notifying team members and integrating with schedules.
How-To Video
Prerequisites
- Access to a project in BuilderPal.
- Team members or subcontractors available for assignment.
Steps
-
Navigate to your project. Go to https://app.builderpal.com/project/

-

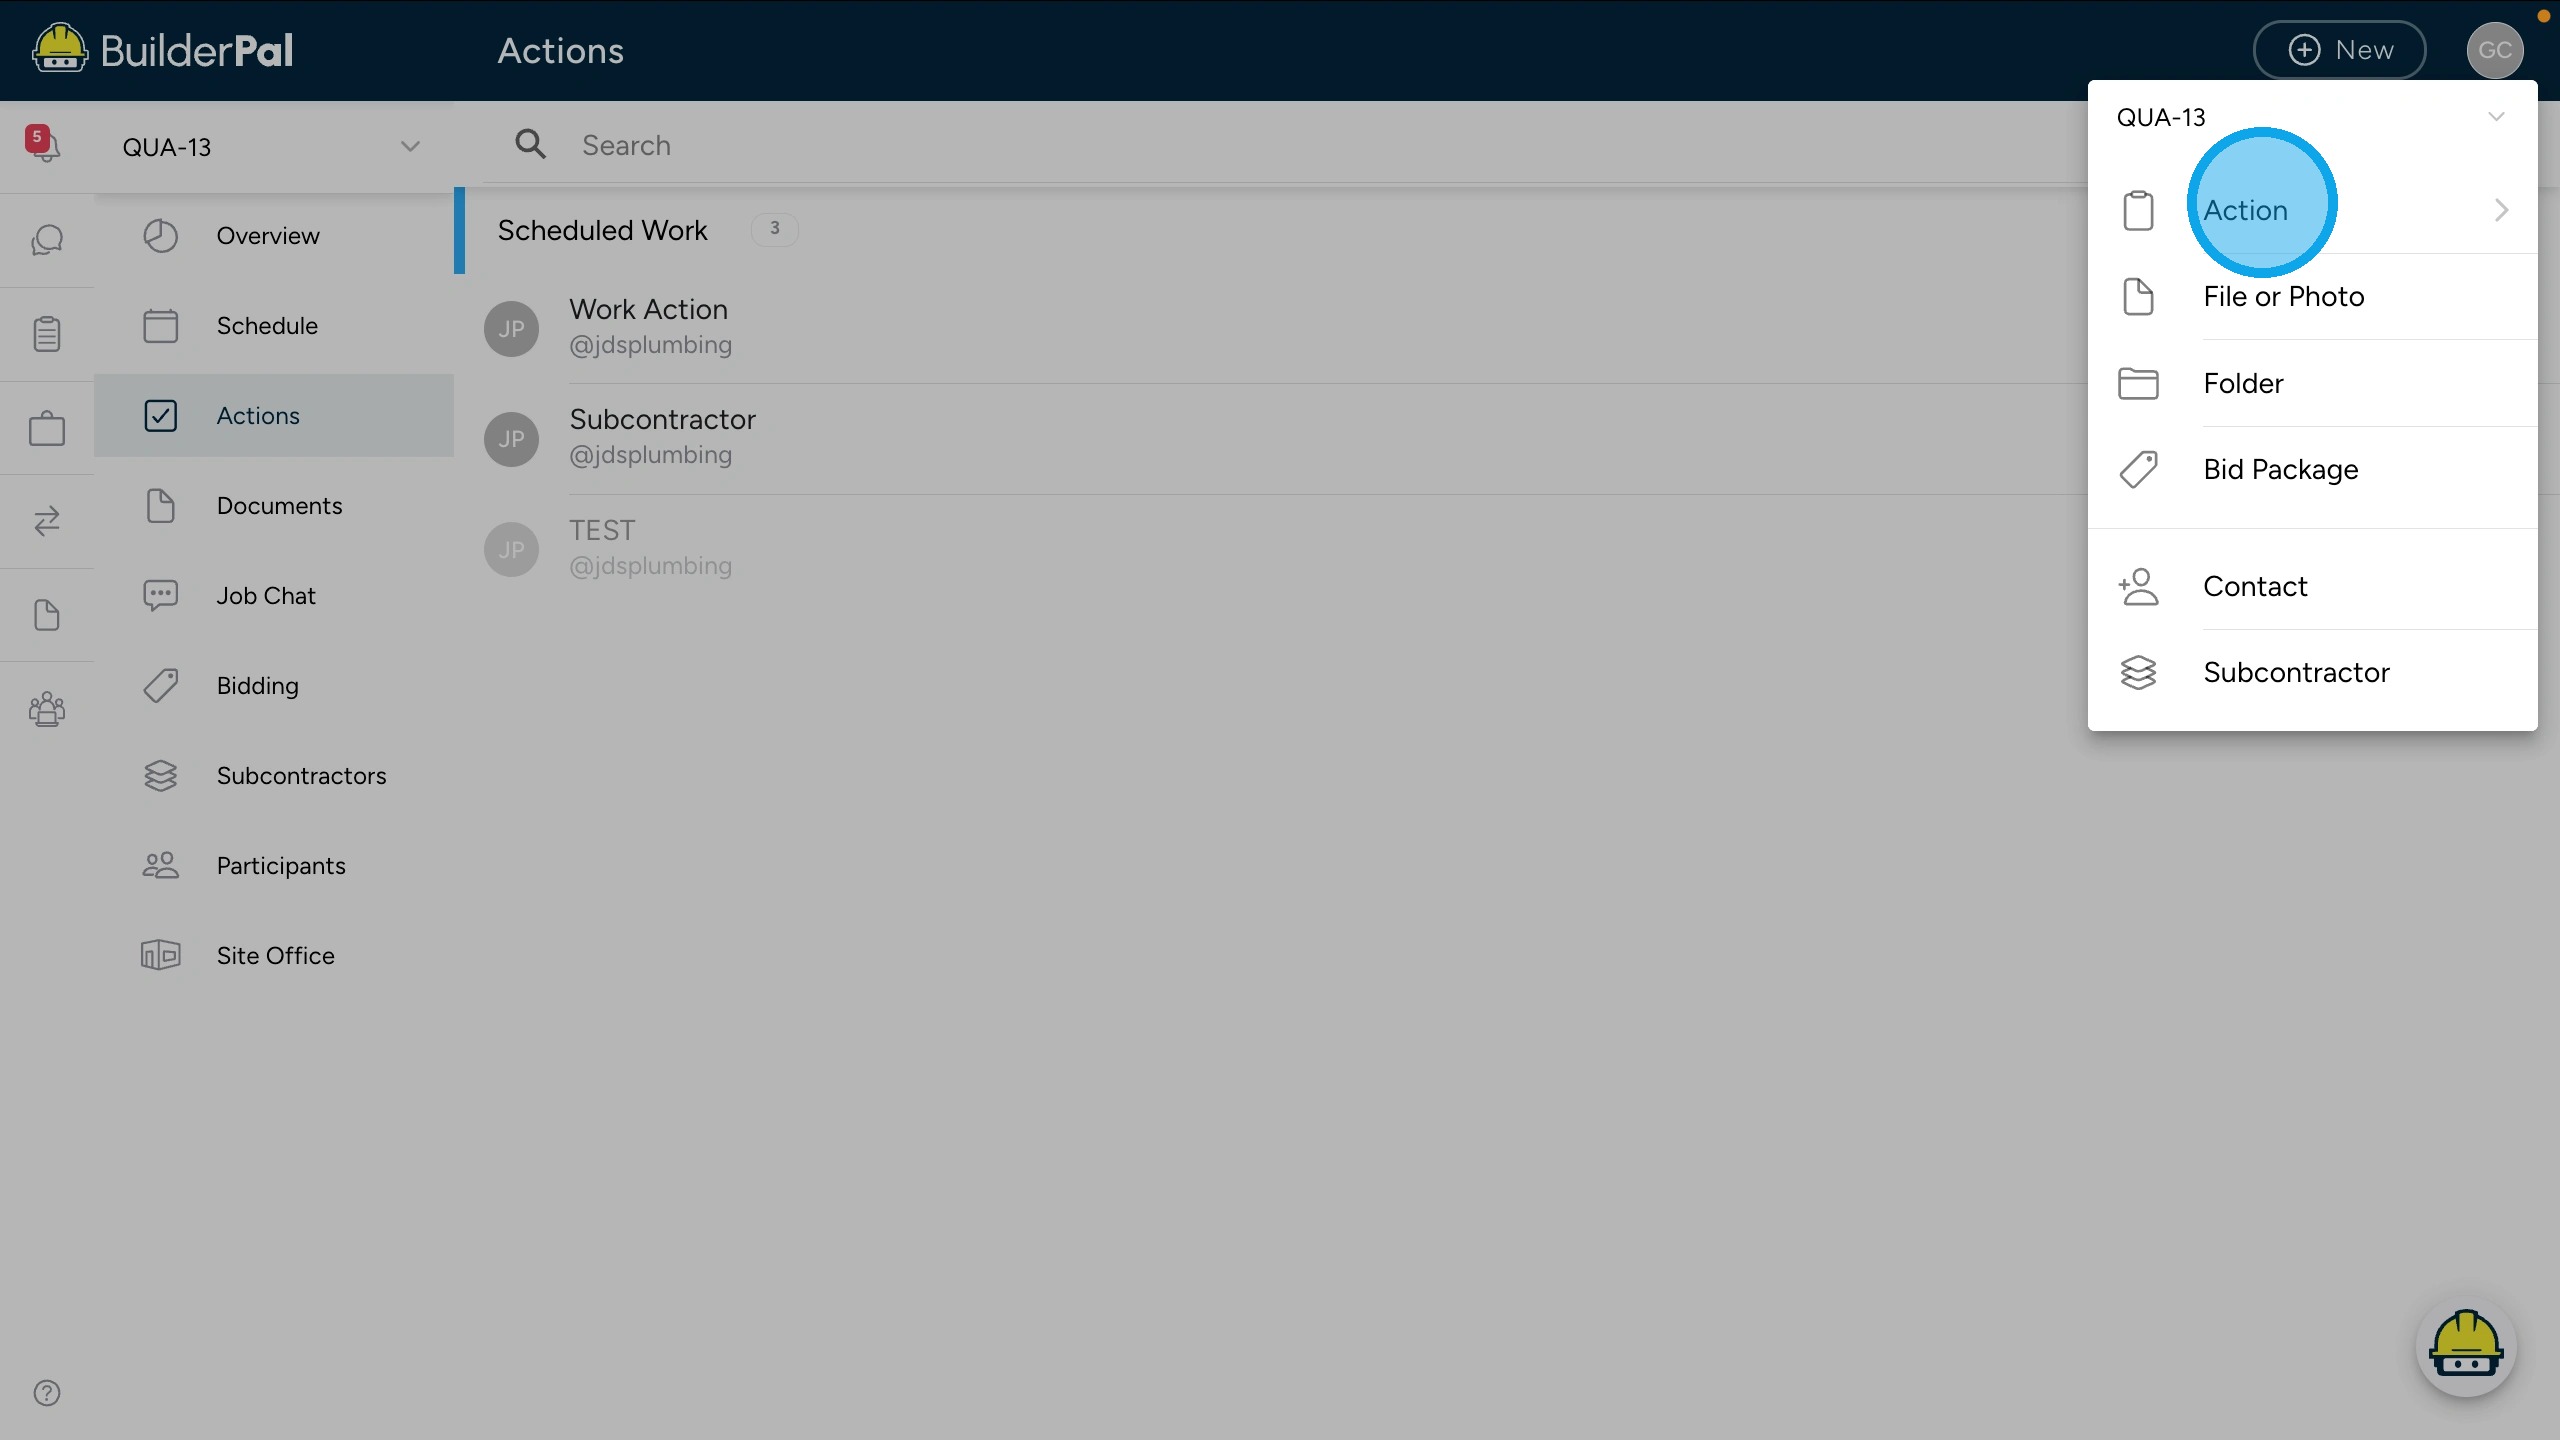
Open the New dropdown and select Action. This opens the action creation menu.
-
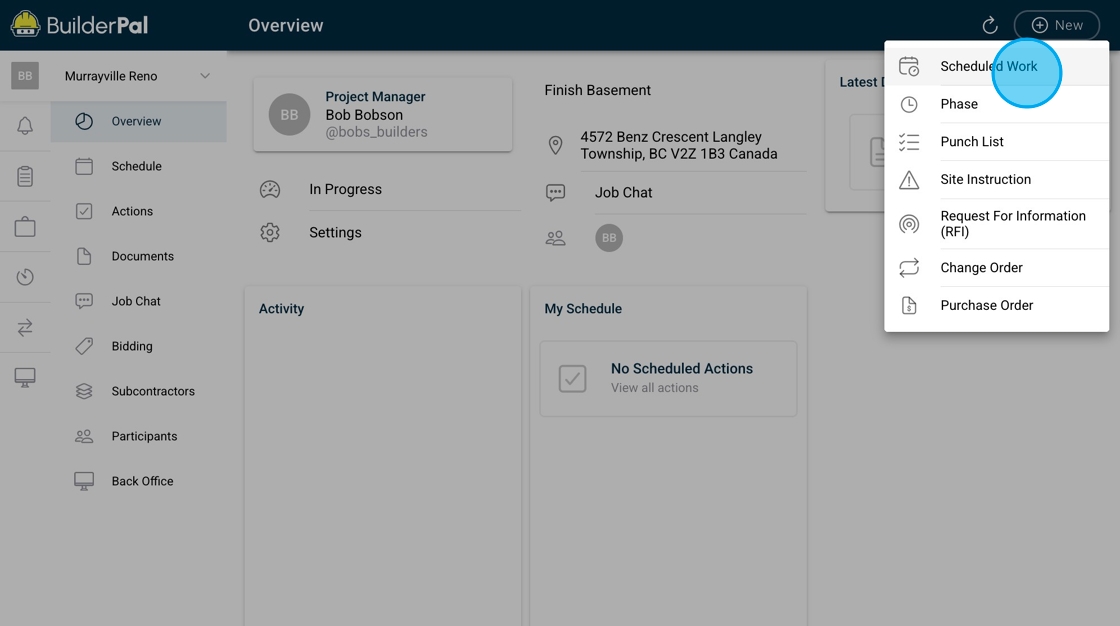
Choose the action type. Select from the list, such as Scheduled Work for time-bound tasks.
-

Enter the title and details. Provide a clear title and any additional information needed for the action.
-

Set dates if applicable. For scheduled work actions, add start and end dates; refer to specific action guides for other types.
-

Assign the action. Click Assign Scheduled Work (or equivalent) to choose a team member or subcontractor.
-

Add participants. Include others who need updates on the action's progress.
-
Publish the action. Click Publish to save and notify assignees.

-

Review and interact. The action appears in the actions page and schedule; add comments or files as needed.
Confirmation
You can now make comments, add files and more! You can also view in your actions page and schedule. The assignee and participants will be notified in their inboxes.
FAQ
Q: Can I assign an action to multiple people?
A: Yes, select multiple assignees during the assignment step, or add participants for updates without primary responsibility.
Q: What happens if I forget to set dates for a scheduled work action?
A: The action will still create, but it won't appear on calendars until dates are added via editing.
Q: How do notifications work for assigned actions?
A: Assignees and participants receive inbox notifications; check the Inbox Feed for updates.
Q: Is there a limit to the number of actions per project?
A: No limit in BuilderPal Free, but organize them effectively using filters on the Actions page.
Q: Can I create custom action types?
A: Currently, use the predefined types; suggest new ones via support for future updates.
Related Articles
- Edit & Delete Actions
- Permissions & Participants in Actions
- Comment on an Action
- Create a Scheduled Work Action
- Actions Page Overview
What are Actions?
Summary
Actions are BuilderPal’s way of turning real construction work into trackable, accountable items. They capture what needs to happen, who owns it, and the conversation and documents around it—all in one place.
Why It Matters
The problem Actions solve
- Work gets scattered across texts, emails, notes, and calendars
- It’s unclear who owns what
- Important details and decisions get buried in chat threads
The Benefit to Contractors
- Every piece of work has a clear owner
- Communication stays tied to the work itself
- Nothing slips through the cracks because updates, files, and decisions live in one place
Actions replace loose follow-ups with structure—without adding complexity.
How It Works
Actions are the core work items in BuilderPal.
Almost everything that happens on a project—work, questions, approvals, purchases, fixes—lives inside an Action.
At a high level, every Action includes:
- A title that describes the work
- An Action type (Scheduled Work, Punch List, RFI, etc.)
- An owner (the assignee responsible for it)
- Participants who need visibility or updates
- Requirements, comments, and attachments
- A status that reflects where things stand
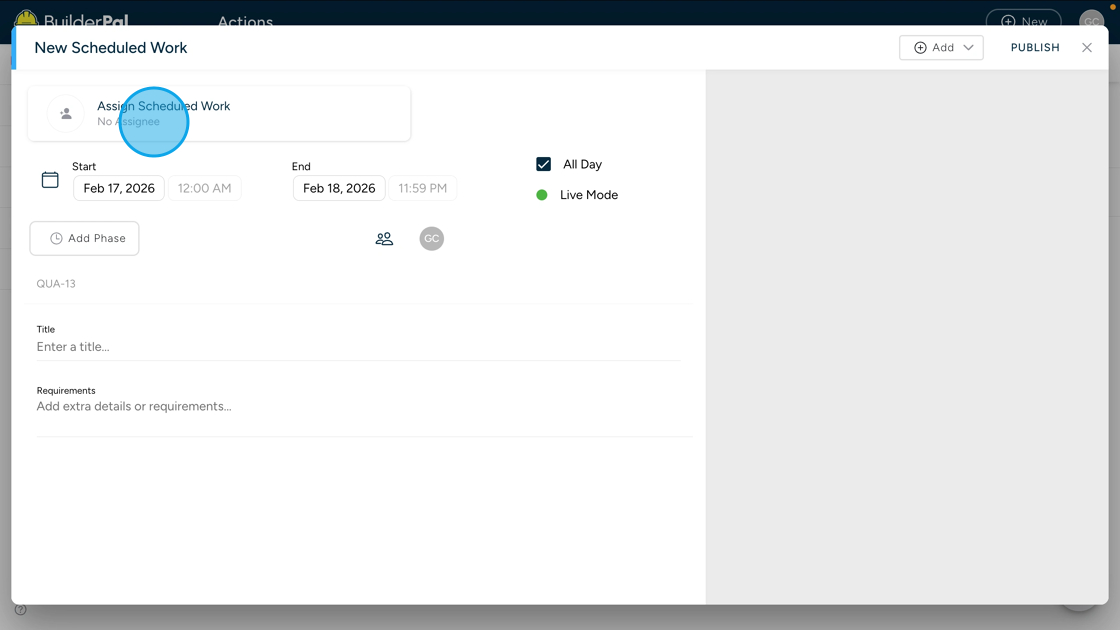
While Actions used to be called “tasks,” they go further than a basic task. An Action combines:
- The work itself
- The communication about that work
- The documents and decisions tied to it
Different Action types add structure for different situations:
- Scheduled Work adds dates and scheduling
- Punch Lists track fixes and deficiencies
- RFIs capture questions and clarifications
- Change Orders, Purchase Orders, and Bills handle scope and cost
Some Actions can also be linked together, reflecting how real work, approvals, and costs connect on a project—but each one still stands on its own as a single source of truth.
When to Use Actions
Use an Action whenever:
- Someone needs to do something
- A question needs to be answered
- Work needs to be scheduled or tracked
- A decision, approval, or cost needs documentation
If it matters to the project, it should be an Action.
Related Articles
View Actions
Summary
This article explains where to find Actions in BuilderPal and how to open them. Actions can be viewed from your Inbox, To Do list, project Actions, or the Schedule, depending on how you prefer to work.
Prerequisites
- Access to at least one BuilderPal project
- You are assigned to, or a participant in, one or more Actions
Steps
1. View Actions from your Inbox
The Inbox is the main entry point for viewing Actions.
Your Inbox shows:
- Actions assigned to you
- Actions you’re a participant in
- Updates like comments, schedule changes, and status changes
Click any Inbox item to open the full Action and view its details, conversation, and attachments.
2. View Actions from your To Do list
The To Do list shows all Actions you’re assigned to or participating in across all projects.
From the To Do list, you can:
- See all your open Actions in one place
- Switch to a schedule-style view for date-based Actions
- Click any Action to open it
This view is useful when you want to focus on your work without jumping between projects.
3. View Actions inside a project
Each project has an Actions view that shows all Actions within that project you have access to.
Use this view when you want to:
- See everything happening on a specific job
- Open Actions by type, status, or context within the project
Click an Action to open it and review details, participants, and conversation history.
4. View Actions from the Schedule
Date-based Actions, such as Scheduled Work or Punch Lists with due dates, appear on the Schedule.
From the Schedule, you can:
- See upcoming and in-progress work
- Click any scheduled item to open the related Action
This is helpful for planning work over time and understanding what’s coming up.
Confirmation
You’ll know it worked when the Action opens and you can see its title, status, assignee, requirements, and conversation in a single view.
Tips
- If you’re responding to updates, start in the Inbox
- If you’re planning your workload, use the To Do list or Schedule
- If you’re reviewing a specific job, open Actions from the project view
Related Articles
- Edit & Delete Actions
- Permissions & Participants in Actions
- Comment on an Action
- Create a Scheduled Work Action
- Actions Page Overview
Edit, Update, Archive, or Delete an Action
Summary
This tutorial shows how to edit an Action, update its status, archive it, or permanently delete it in BuilderPal. These tools let you make changes after an Action has been created, while keeping work and communication accurate.
Prerequisites
- You have access to an existing Action
- You have permission to make changes to the Action
Edit an Action
Use Edit Details when you need to change the Action’s title, requirements, dates, or other fields.
Steps
- Open the Action you want to edit.
- Click the three-dot menu next to the Action title.
- Select Edit Details.
- Make your changes.
- Click SAVE in the top-right corner to apply the updates.
Changes are not saved automatically. If you exit without clicking SAVE, your changes will be lost.
Update Action Status
Updating an Action’s status helps communicate progress without changing the Action details.
Steps
- Open the Action.
- Click the status button (for example, Incomplete).
- Select the new status.
The updated status is immediately visible to all participants.
Archive an Action
Archiving removes an Action from active views without deleting it.
Steps
- Open the Action.
- Click the three-dot menu next to the Action title.
- Select Archive Action.
Archived Actions are no longer active but remain stored for reference.
Delete an Action
Deleting an Action permanently removes it from the project.
Steps
- Open the Action.
- Click the three-dot menu next to the Action title.
- Select Delete Action.
- In the confirmation dialog, click Confirm.
Deleted Actions cannot be recovered.
Next Steps
- Learn how to create and assign Actions
- Understand who can edit or delete Actions
- Explore Action types and when to use each
Related Articles
Communication with Actions
Summary
In BuilderPal, communication is built directly into Actions. Messages, files, and updates live inside the Action itself, keeping conversations tied to the work they relate to.
Why It Matters
The problem Actions solve
- Project conversations get split across texts, emails, and chat apps
- Decisions lose context when they’re separated from the work
- Teams aren’t sure which message reflects the current state
The benefit to contractors
- Every conversation stays attached to the exact work it refers to
- Everyone involved sees the same context and history
- Fewer check-ins, fewer follow-ups, and less confusion
Actions eliminate the need to manage work in one place and talk about it in another.
How Communication Works in Actions
Every Action includes a built-in conversation thread. This thread is the default place to discuss anything related to that Action.
Inside an Action, communication includes:
- Comments from participants discussing details, changes, or next steps
- Files and attachments shared directly in the conversation, similar to a messaging app
- System-generated updates that record important changes automatically

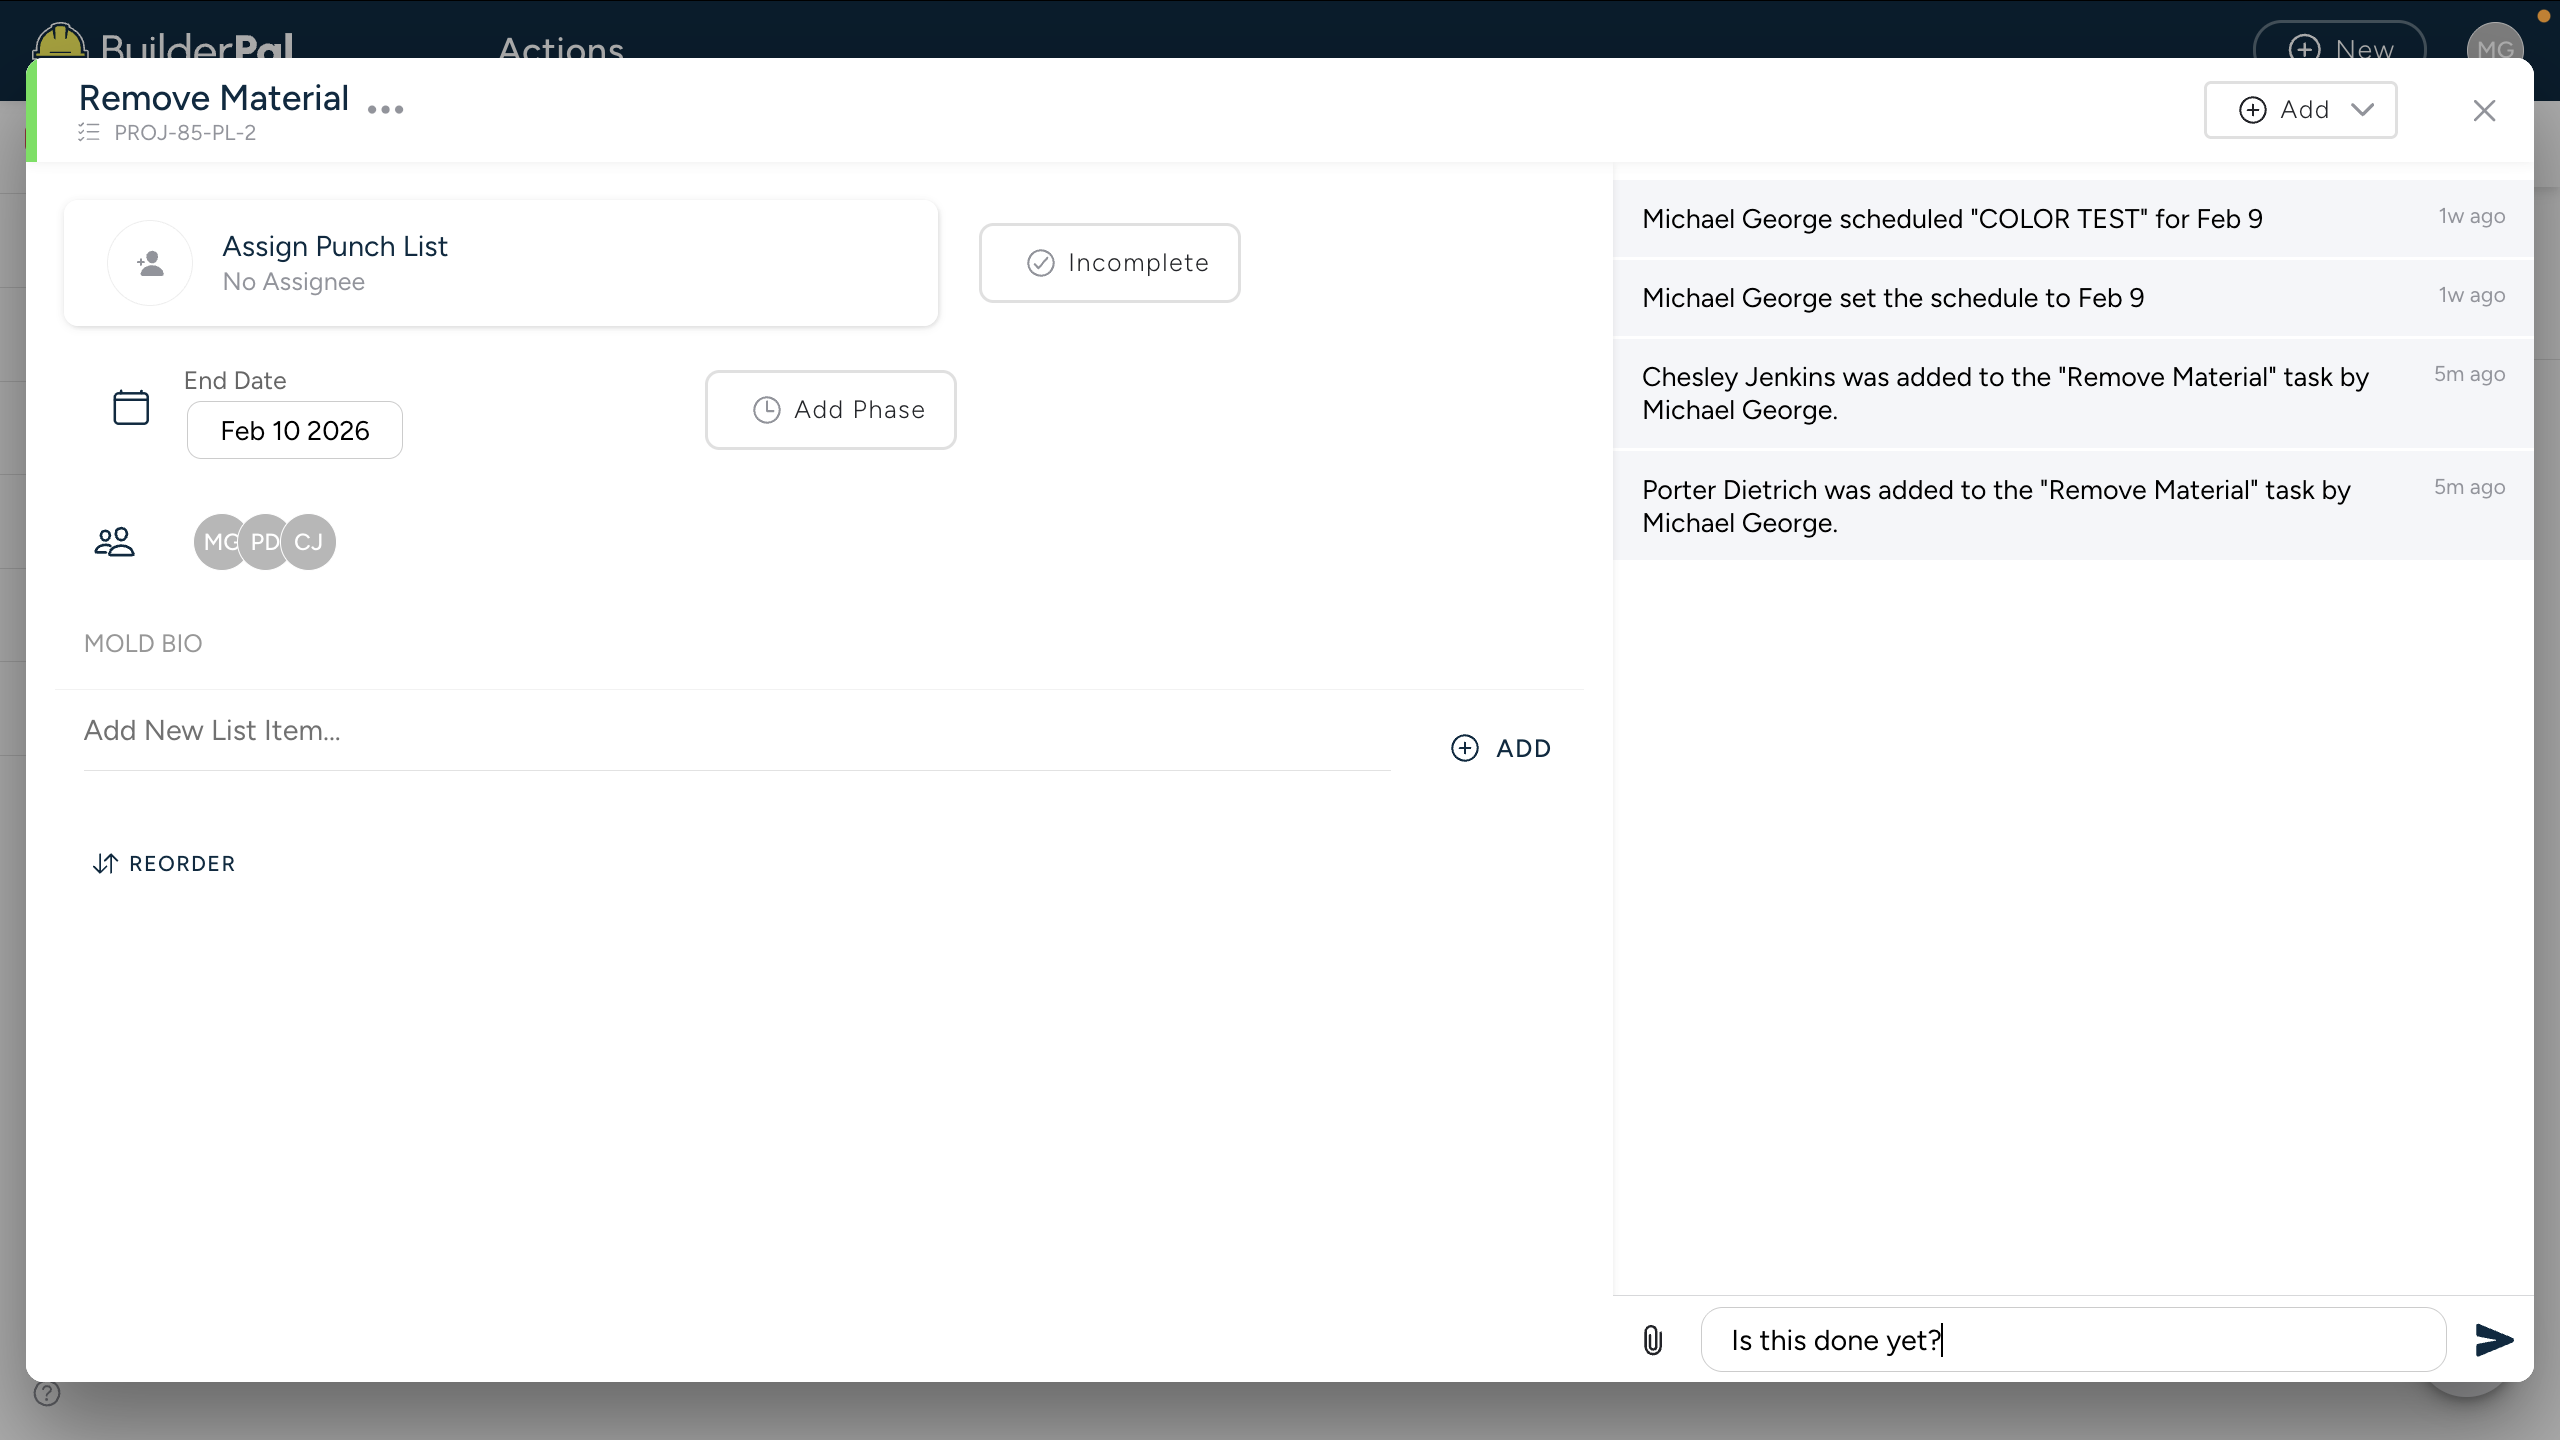
All communication becomes part of the Action’s history, creating a single source of truth.
Automatic Updates
BuilderPal automatically records key changes as system messages inside the Action, including:
- When the Action is created
- When schedules change
- When status updates occur
- When assignees or participants change
These updates keep everyone informed without relying on someone to manually explain what changed.
Inbox Notifications
When activity happens on an Action, participants receive notifications in their Inbox.
The Inbox is designed to surface changes and bring attention back to the Action. Clicking a notification always opens the Action, where the full context and conversation live.
Controlling Notifications
Participants can control how they receive updates from an Action:
- Notifications can be muted when updates are no longer relevant
- Users can remove themselves from the Action if they are no longer involved
This keeps communication focused without overwhelming people with noise.
Next Steps
- Learn how to view and respond to Actions
- Understand how editing or status changes affect communication
- Explore how communication appears across different Action types
Related Articles
Permissions & Participants in Actions
Summary
This article explains how Action visibility and permissions work in BuilderPal—who can see an Action, who can interact with it, and how roles affect editing, assigning, and deleting.
Prerequisites
- You understand your team role (Admin, Project Manager, Supervisor, Team Member, etc.).
- You have access to at least one project.
How Action Visibility Works
Action visibility is based on project access and participation.
You can see an Action if:
- You are assigned to it.
- You are added as a participant.
- You are part of the project where the Action exists.
- You belong to a team involved in the Action (GC or Sub).
There is no follower mode and no read-only mode.
If you are a participant, you can see the entire Action.
You cannot see an Action if:
- You do not have access to the project.
- You are not assigned or added as a participant.
- Your team is not involved in the Action.
What Participants Can Do
All participants—regardless of role—can:
- View all Action details
- Comment on the Action
- Upload attachments
- Complete the Action
- Reassign the Action (to internal team members or subcontractors, depending on role)
Participants always see the full Action, including attachments, descriptions, comments, fields, and history.
Editing and Deletion Rules
Editing and deletion are determined by role permissions, not participation.
- Admins, Project Managers → Full edit + delete
- Team Members, Supervisors → Can edit most fields; cannot delete unless allowed
- Subcontractors → Can edit/comment/complete assigned Actions; cannot delete GC-created Actions
Assigning Actions
All users can assign Actions.
When assigning:
- The Team Members tab shows your internal company members.
- The Subcontractors tab shows all hired trades on the project.
GCs can assign Actions to subcontractors.
Subcontractors cannot assign Actions to GC users or GC team members.
Actions do not move between projects.
They stay inside the project where they were created.
Action Permissions Across Project Types
GC-Owned Projects
GC team members can:
- Create Actions
- Assign Actions to internal users or subcontractors
- Edit and manage all Actions (role-based)
- See every Action inside the GC project
Subcontractors can:
- See and work on Actions assigned to them
- Create Actions for themselves within the subcontractor scope
Subs cannot:
- Assign Actions to GC users
- See GC-internal Actions
Subcontractor-Owned Projects
These projects belong exclusively to the subcontractor’s company.
Subcontractors can:
- Create, edit, and manage all Actions in their own project
- Assign Actions to other members of their team
- Manage their internal schedule
GCs:
- Cannot access the subcontractor’s project
- Only see surfaced documents and limited activity inside their GC project
- Cannot see or create Actions in the subcontractor project unless directly assigned (rare)
My Tasks
Every user has a private project called My Tasks.
- Only the individual user can access it.
- Even Admins cannot view it unless explicitly invited.
- Users can create and manage personal Actions.
This space is ideal for private notes, drafts, and personal planning.
Editing and Deletion Permissions
Editing and deleting Actions follow role permissions:
- Admins → Full permissions
- Project Managers → Full project-level Action management
- Team Members / Supervisors → Edit most content; deletion depends on permissions
- Subcontractors → Edit assigned Actions; cannot delete GC-created Actions
Participation does not override these permissions.
Summary Table
| Area | GC Team Members | Subcontractors | My Tasks |
|---|---|---|---|
| See Actions | All project Actions (role-based) | Only assigned Actions | Only their own |
| Create Actions | Yes | Yes (sub project or subcontractor scope) | Yes |
| Assign Actions | Yes (GC + Subs) | Only their own team | Only self |
| Edit Actions | Role-based | Yes (assigned or created) | Yes |
| Delete Actions | Role-based | Cannot delete GC-created Actions | Yes |
| Full Visibility as Participant | Yes | Yes | Yes |
Related Articles
- Roles & Permissions Overview
- Project Access Explained
- Office Permissions and Access
- Manage Team Member Permissions
How Actions Flow Between GCs and Subs
Summary
BuilderPal uses a directional flow model to handle work between general contractors and subcontractors. Actions flow downstream when work is assigned and flow upstream when updates, responses, and completion move back to the GC—without transferring ownership or exposing internal work.
Why It Matters
The problem this model solves
- GCs and subcontractors do not operate as a single team
- Not all work or communication should be visible across companies
- Assignments often need to cross company boundaries without breaking accountability
Without clear direction, projects either become too restrictive or too exposed.
The benefit to contractors
- Clear responsibility across company lines
- Clean handoffs without duplicating work
- No accidental access to internal Actions
- A shared source of truth for work that involves both sides
The flow model allows collaboration without collapsing company boundaries.
How Action Flow Works
Actions always belong to the project where they are created. They do not move between projects or change ownership.
Instead, BuilderPal controls how Actions are shared and responded to between companies.
Downstream Flow (GC → Sub)
Downstream flow happens when a general contractor assigns an Action to a subcontractor.
Common examples include:
- Assigning Scheduled Work
- Issuing Punch List items
- Assigning RFIs or Site Instructions
In a downstream flow:
- The Action remains owned by the GC project
- The subcontractor sees the full Action
- Communication, files, and updates happen inside that same Action
This is the primary way GCs coordinate work with subs.
Upstream Flow (Sub → GC)
Upstream flow happens when a subcontractor responds or submits information inside an Action assigned by the GC.
This can include:
- Completing assigned work
- Uploading files or photos
- Responding to RFIs
- Updating required information
- Marking work complete
Although subcontractors cannot assign Actions to GC users, their updates flow upstream through the same Action. The GC is notified and sees the response in context.
Upstream flow is about information and progress moving back, not ownership changing.
Why Actions Don’t Move Between Projects
Actions never transfer between GC and subcontractor projects.
Instead:
- One Action acts as the shared record
- Visibility is controlled by assignment and participation
- Permissions are enforced by role and project ownership
This prevents duplicate Actions, lost context, and conflicting versions of work.
What This Means in Practice
- GCs assign work downstream
- Subs respond upstream within the same Action
- Internal planning stays internal
- Shared work stays shared
Responsibility moves, but ownership stays clear.
Next Steps
- Learn how permissions affect what each role can edit
- Explore Action types commonly used across companies
- Understand how communication and notifications work inside Actions
Related Articles
Action Types
Punch Lists
Scheduled Work
Purchase Orders
Change Orders
RFI's
Summary
This tutorial covers how to create and manage Requests for Information (RFIs) in BuilderPal to seek clarifications on project details, ensuring timely resolutions and maintaining project documentation.
Prerequisites
- Role or permission needed
- An active project set up in BuilderPal
- Relevant details like question description, drawings, or specs ready for attachment
Steps
There are two ways to create an RFI in BuilderPal: from the project overview or from the Actions tab.
Method 1: From the Project Overview
-
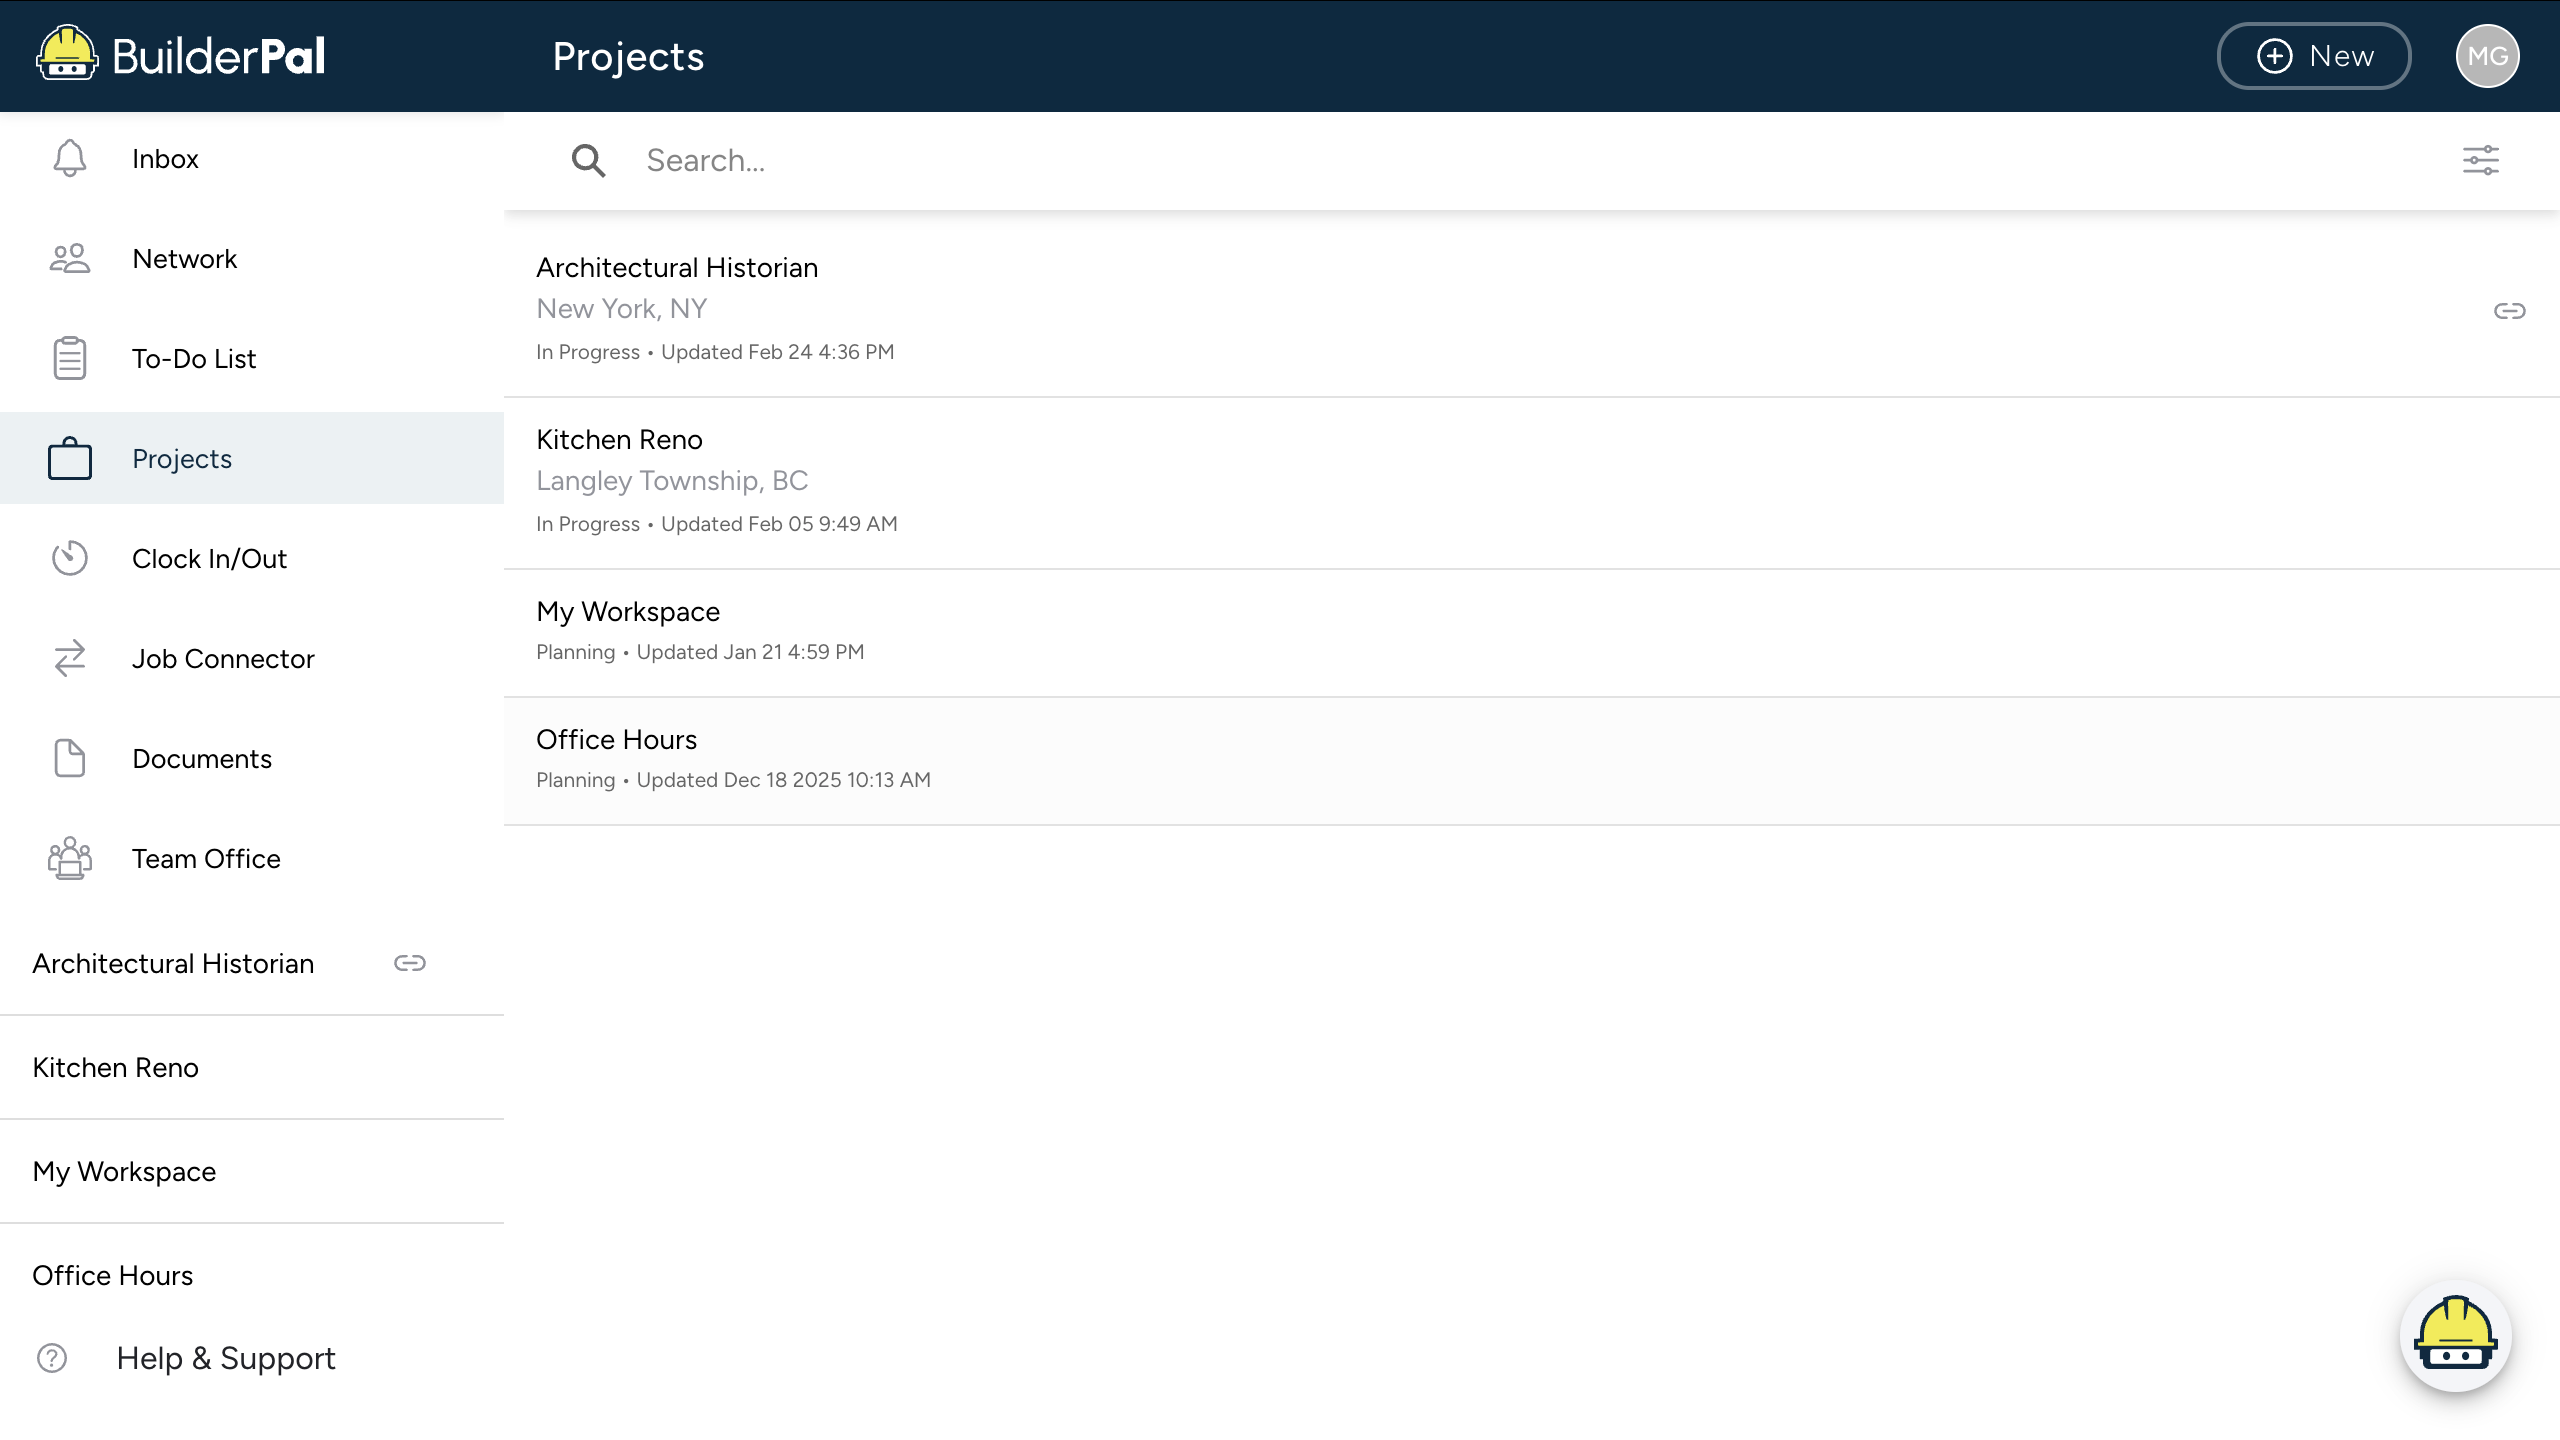
Log in to BuilderPal and select your project. — Open the BuilderPal app, enter your credentials, and choose the project from the dashboard.

-
Access the project. — In the project overview screen, click New+ to access the dropdown menu located in the top right corner, select Actions > RFI.

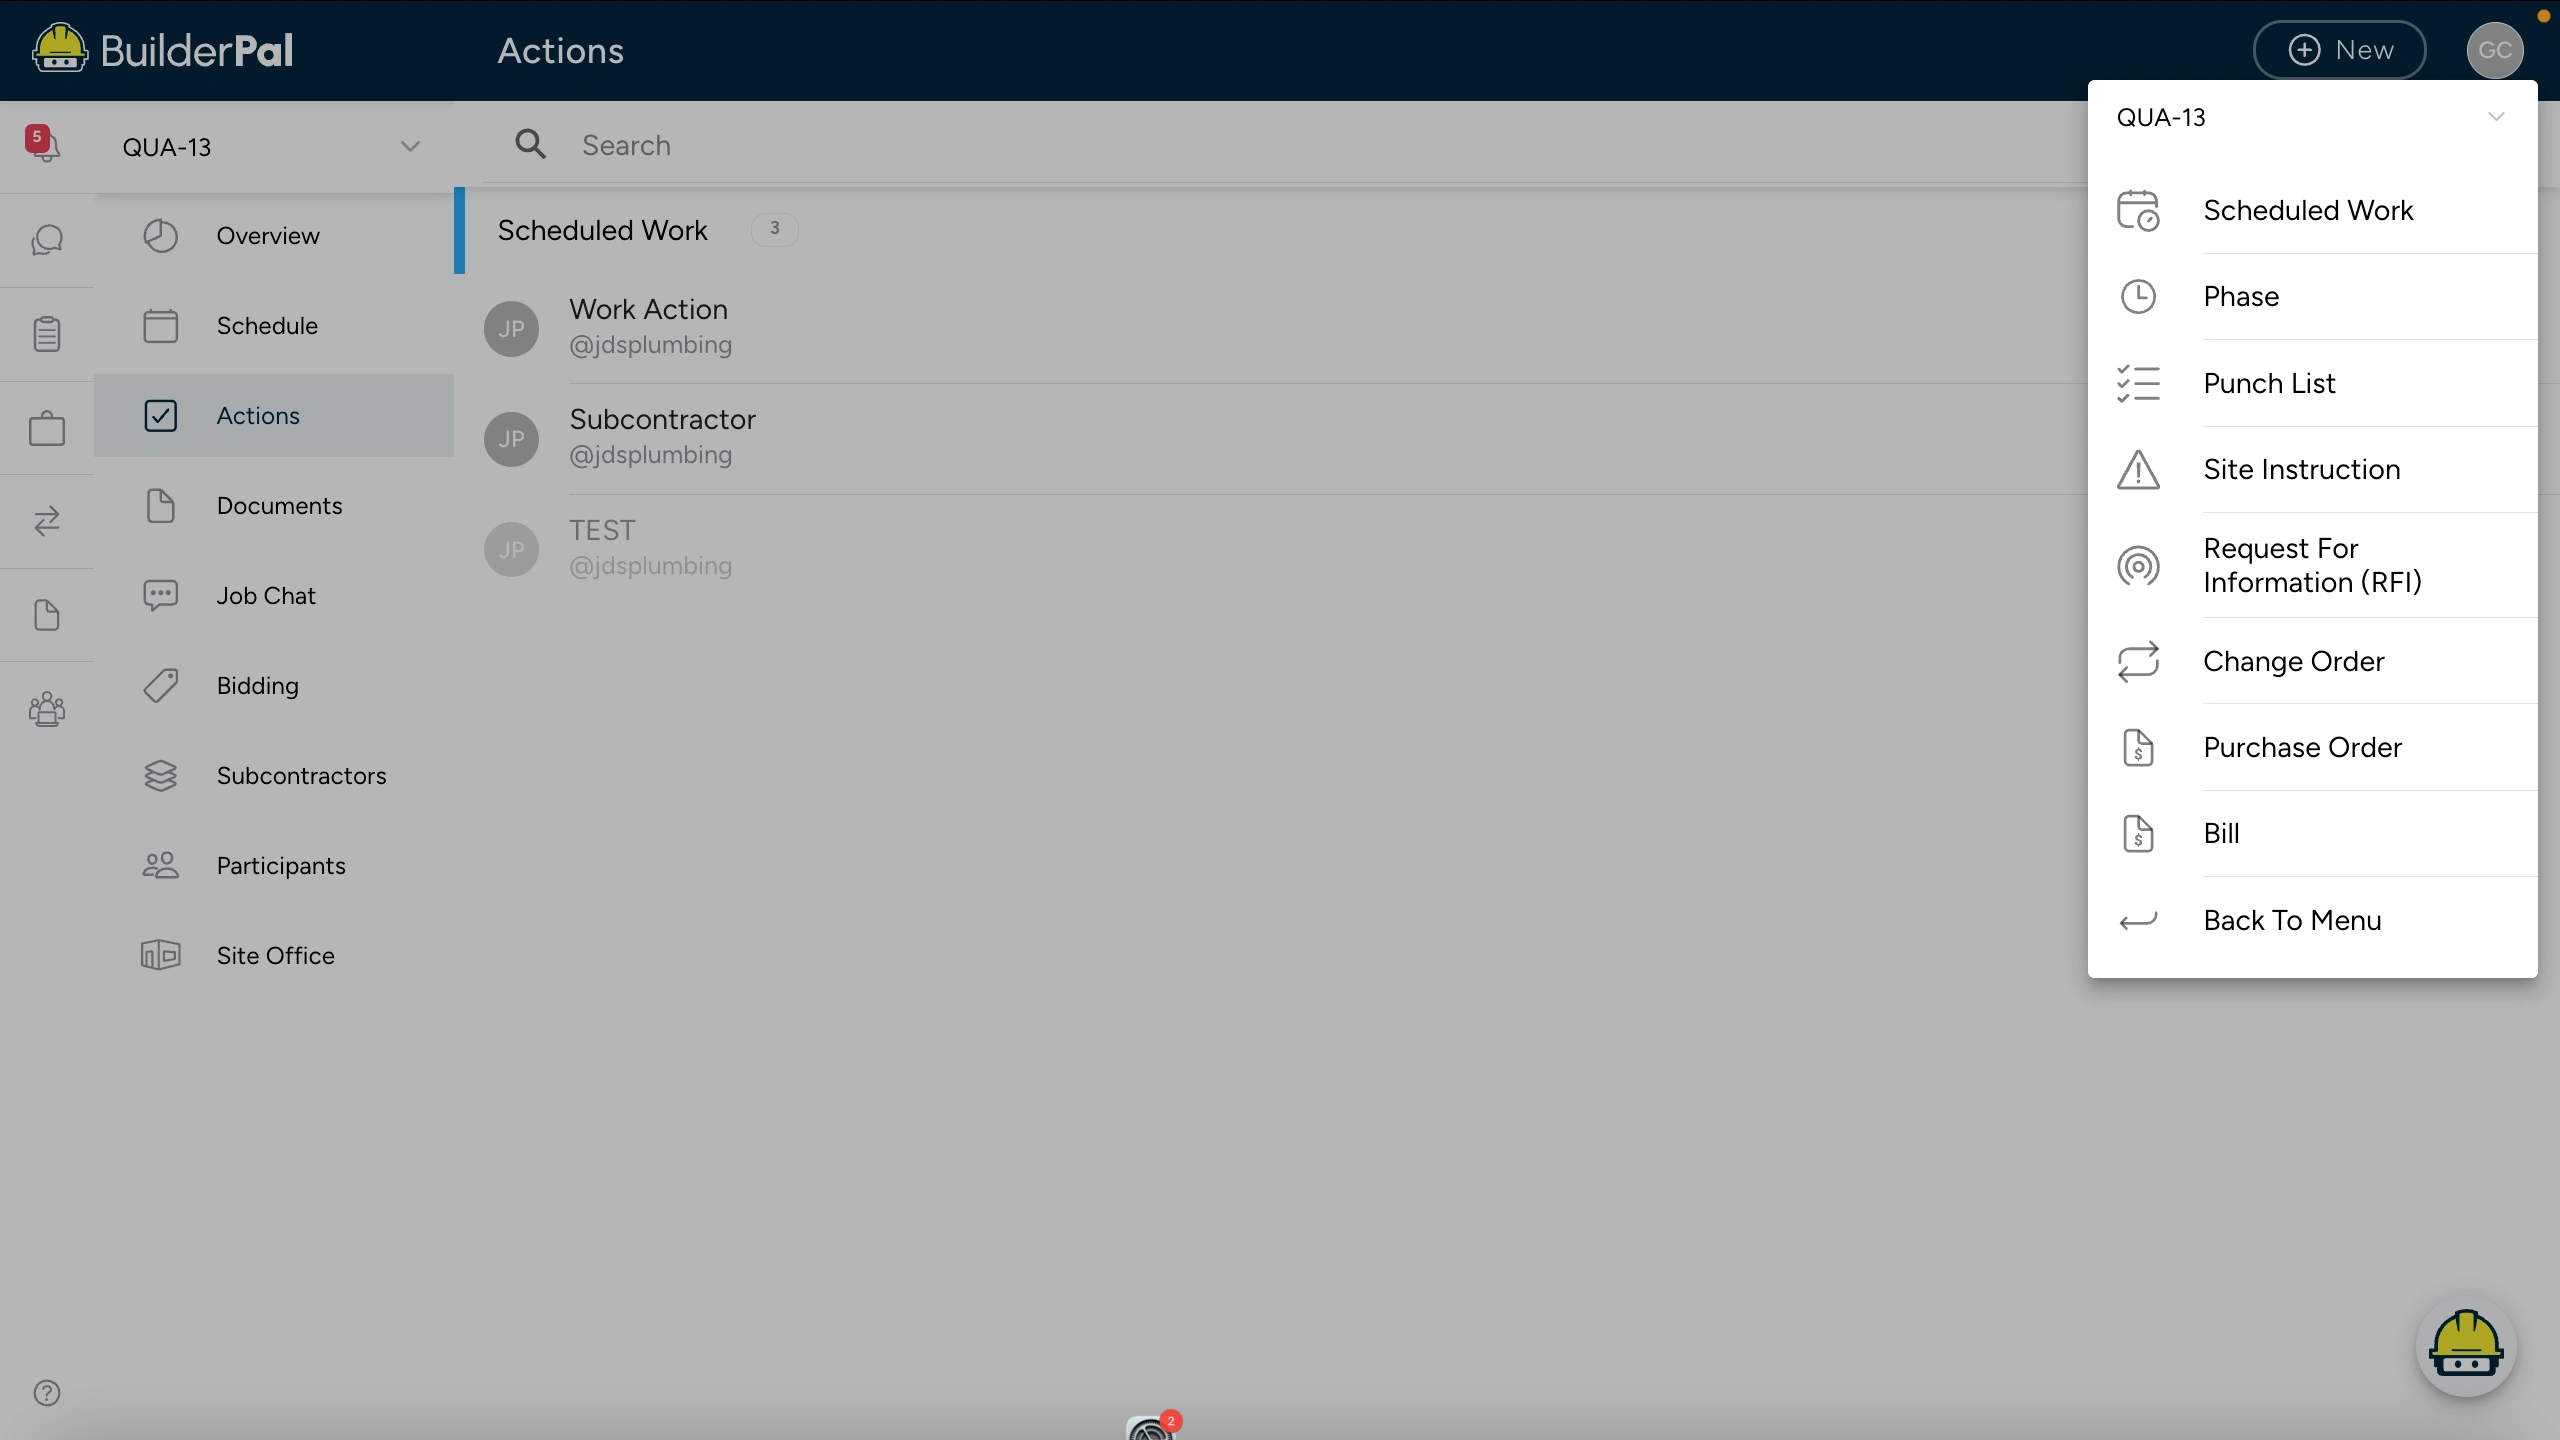
Method 2: From the Actions Tab
Confirmation
You'll know it worked when the RFI appears in the Actions overview, and the assignee receives a notification requesting their response.
FAQ
Q: What should be included in an RFI description? A: A clear question, context from plans or specs, and any potential impacts to help the responder provide accurate information.
Q: Can RFIs be linked to other actions? A: Yes, you can reference related change orders, punch lists, or site instructions within the RFI details.
Q: How are RFI responses handled? A: Responders can reply directly in BuilderPal, updating the status and attaching answers or revised documents.
Q: What if an RFI requires urgent attention? A: Set a short due date and use notifications to alert key stakeholders; escalate via job chat if needed.
Q: Are RFIs auditable for project records? A: Yes, all RFIs and responses are logged with timestamps and user details for compliance and disputes.