Get Started with Scheduling & Calendars
Summary
This guide walks you through the three calendar views in BuilderPal—Personal, Project, and Master Schedule—and shows you how to quickly start using them to stay on top of deadlines and tasks.
Prerequisites
- Role or permission needed: Any team member
- Any setup required: Log in to BuilderPal
Steps
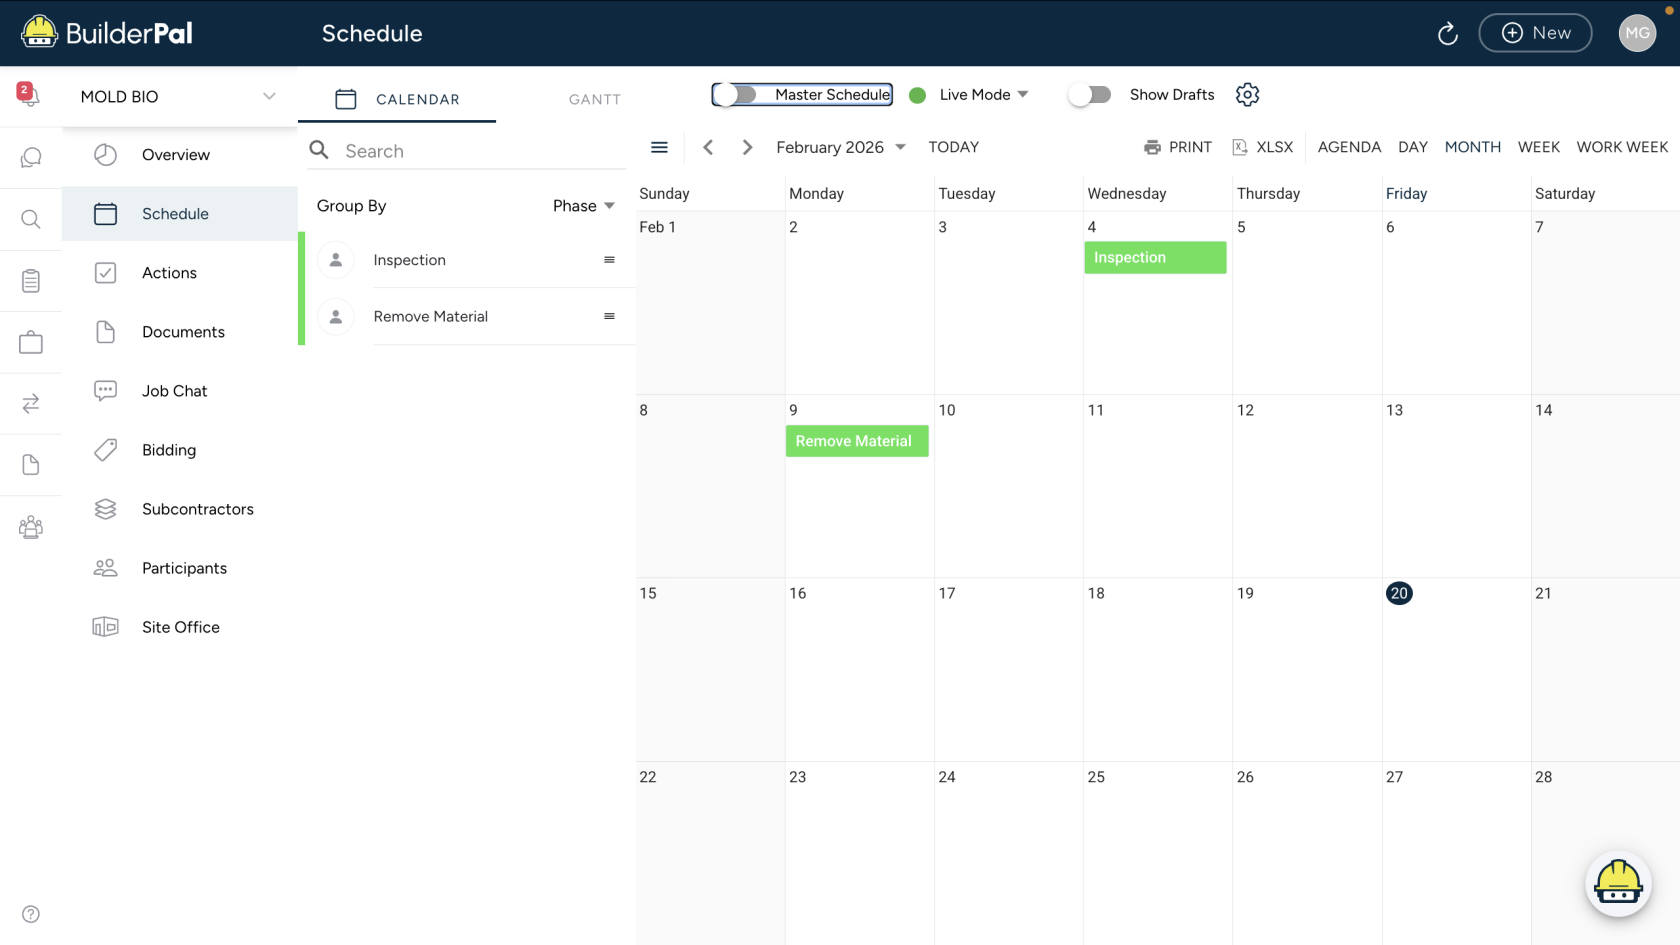
1. Open Your Personal Schedule
- Instruction: From the left sidebar, click To-Do List, then click the Schedule tab at the top.
- Screenshot: Insert immediately after this step to show the Schedule tab and calendar view.
2. Switch Between Schedule Views
- Instruction:
- Personal Schedule: Turn Assigned Only ON to see only tasks assigned to you
- Project Schedule: Open any project, then click Schedule in the project sidebar
- Master Schedule: Turn Assigned Only OFF to see all scheduled tasks across projects you have access to

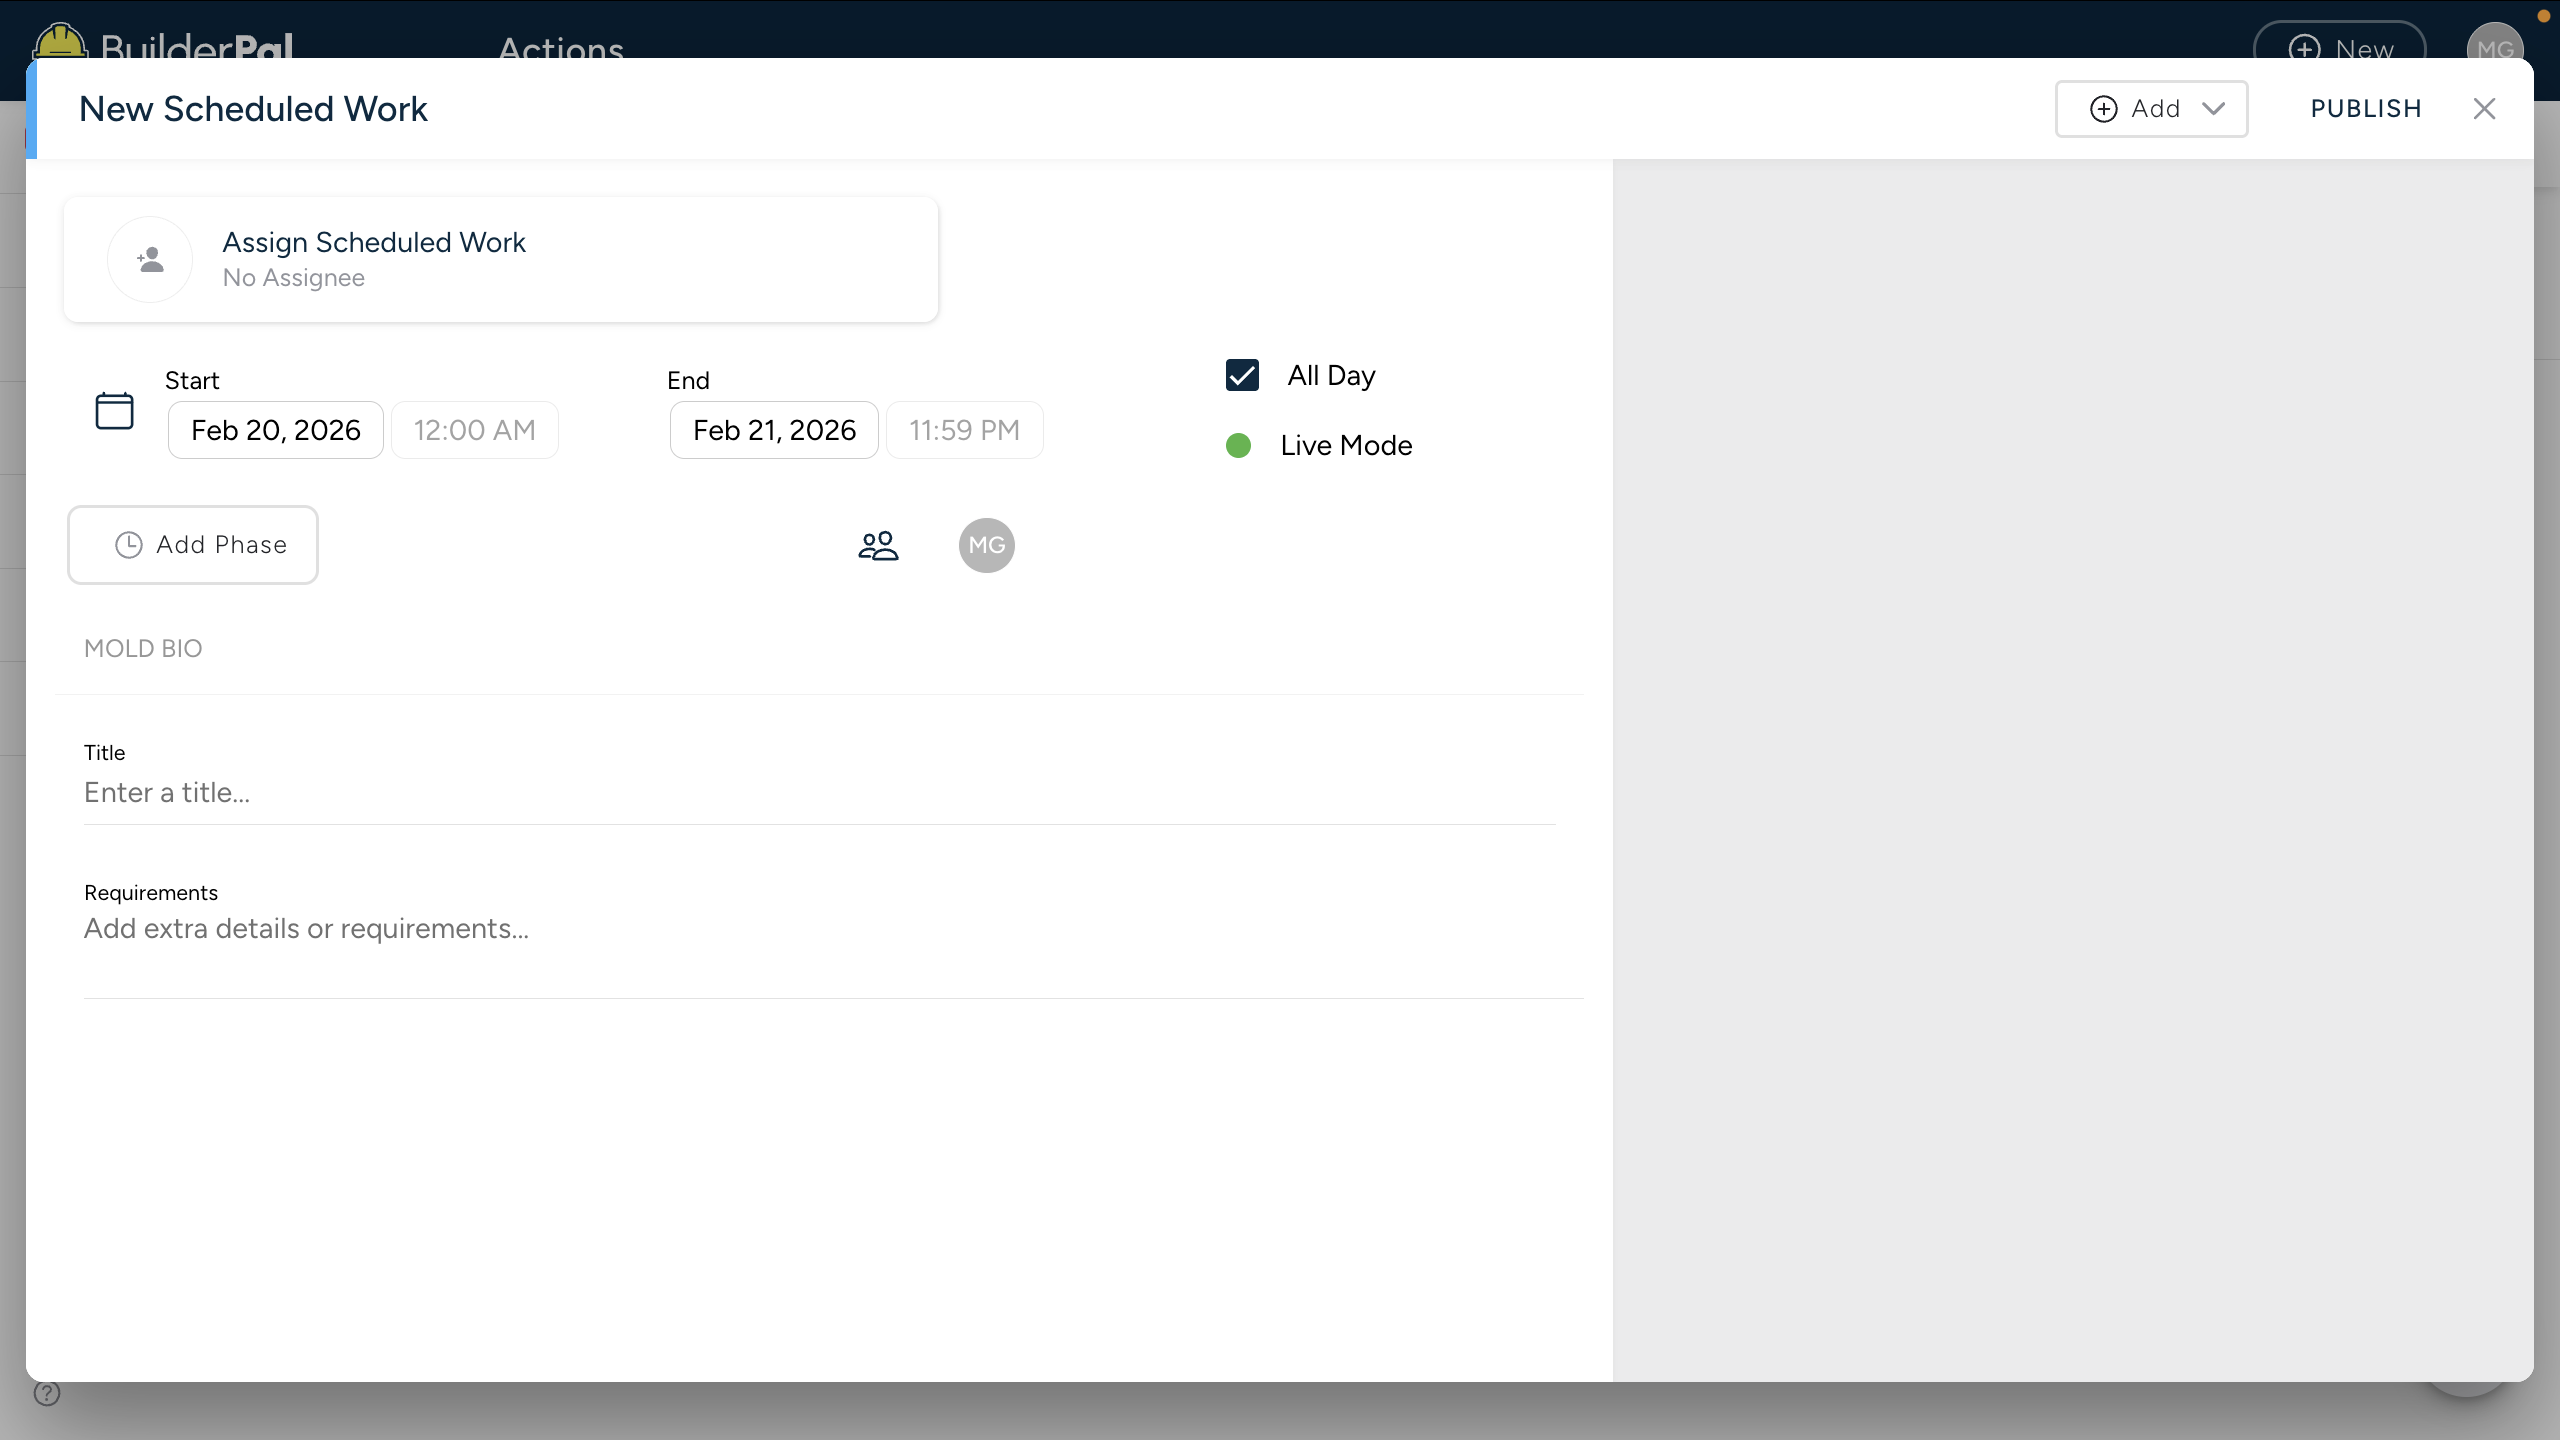
3. Create Your First Scheduled Task
- Instruction:
Click + New Action, choose a task type (such as Site Instruction or Punch List), add a due date, assign it to someone, then click Save.
Confirmation
“You’ll know it worked when you see your tasks appear on the calendar with the correct due date and project name.”
Tips
- Pro tip: Turn Assigned Only off in the Master Schedule to see the full company workload.
- Shortcut: Bookmark the Schedule page for one-click access from any device.
FAQ
Q: What’s the difference between Personal and Master Schedule?
A: Personal Schedule shows only tasks assigned to you. Master Schedule shows all scheduled tasks across every project you have access to.
Q: Can I sync this with Google Calendar?
A: Yes — click Export → Export as .ics from any schedule view.
Q: Why don’t I see some tasks?
A: You may not have permission to the project, or the task does not have a due date yet.