Project Setup & Basics
- Getting Started
- Manage Your Projects
- How Projects Relate to Subcontractors
- Edit Project Details
- Project Access Explained
- Project Settings Reference
- Manage Project Participants
- Sharing & Visibility Rules
- Navigate & Organize Your Projects
- Internal Projects
- What Are Internal Projects?
- How Internal Projects Differ From Regular Projects
- Managing and Working Inside an Internal Project
- My Workspace
Getting Started
Learn the basics of BuilderPal projects — how to create your first project, understand the dashboard, and see how a job moves through its lifecycle.
Create Your First Project
Summary
This tutorial guides you through the process of creating your first project in BuilderPal, allowing you to organize work, assign team members, and set visibility options for collaboration.
How-To Video
Prerequisites
- An active BuilderPal account with Admin or equivalent permissions.
- Project details such as name, description, and address ready.
Steps
-
Navigate to https://app.builderpal.com/notifications.

-
Click "Projects".

-
Click "Get started by creating a new project".

-

Enter your project name, fill in the "Description / Project Notes" field, and add participants if needed.
-

Decide if your project is internal or accessible to hired trades, then click "Next".
-

Enter the project address, then click "Create".
Confirmation
Your new project has been created successfully, and you will be redirected to the project dashboard where you can begin adding actions, schedules, or more details.
FAQ
Can I add participants after creating the project?
Yes, you can manage participants at any time from the project settings or participants section.
What does "internal or accessible to hired trades" mean?
Internal projects are visible only to your team; accessible projects allow invited subcontractors or trades to view and collaborate on relevant details.
Is the project address required?
Yes, it helps with geo-features like mapping and clock-in validation, but you can edit it later if needed.
What if I don't have participants to add yet?
Adding participants is optional during creation; you can skip and invite them later via the project dashboard.
Can I create multiple projects at once?
No, projects are created one at a time, but you can quickly repeat the process for additional ones.
Related Articles
- Edit Projects
- Manage Project Participants
- Switch Between Projects
- Get Started with Scheduling & Calendars
- Create & Assign Actions
Learn The Project Dashboard
This article explains the key features of the Project Dashboard in BuilderPal and how to use them for effective project oversight.
Summary
The Project Dashboard groups navigation, monitoring, and management tools in one place, helping teams stay informed and take action quickly.
Prerequisites
- Role or permission needed: Any team member with access to the project (e.g., Admin GC, Team Project Manager, Team Member)
- Setup required: Log in to your BuilderPal account and select an active project
Steps
-

Access the Project Dashboard
- Log in to BuilderPal via web or mobile.
- Select a project from the Projects menu or search for it.
-
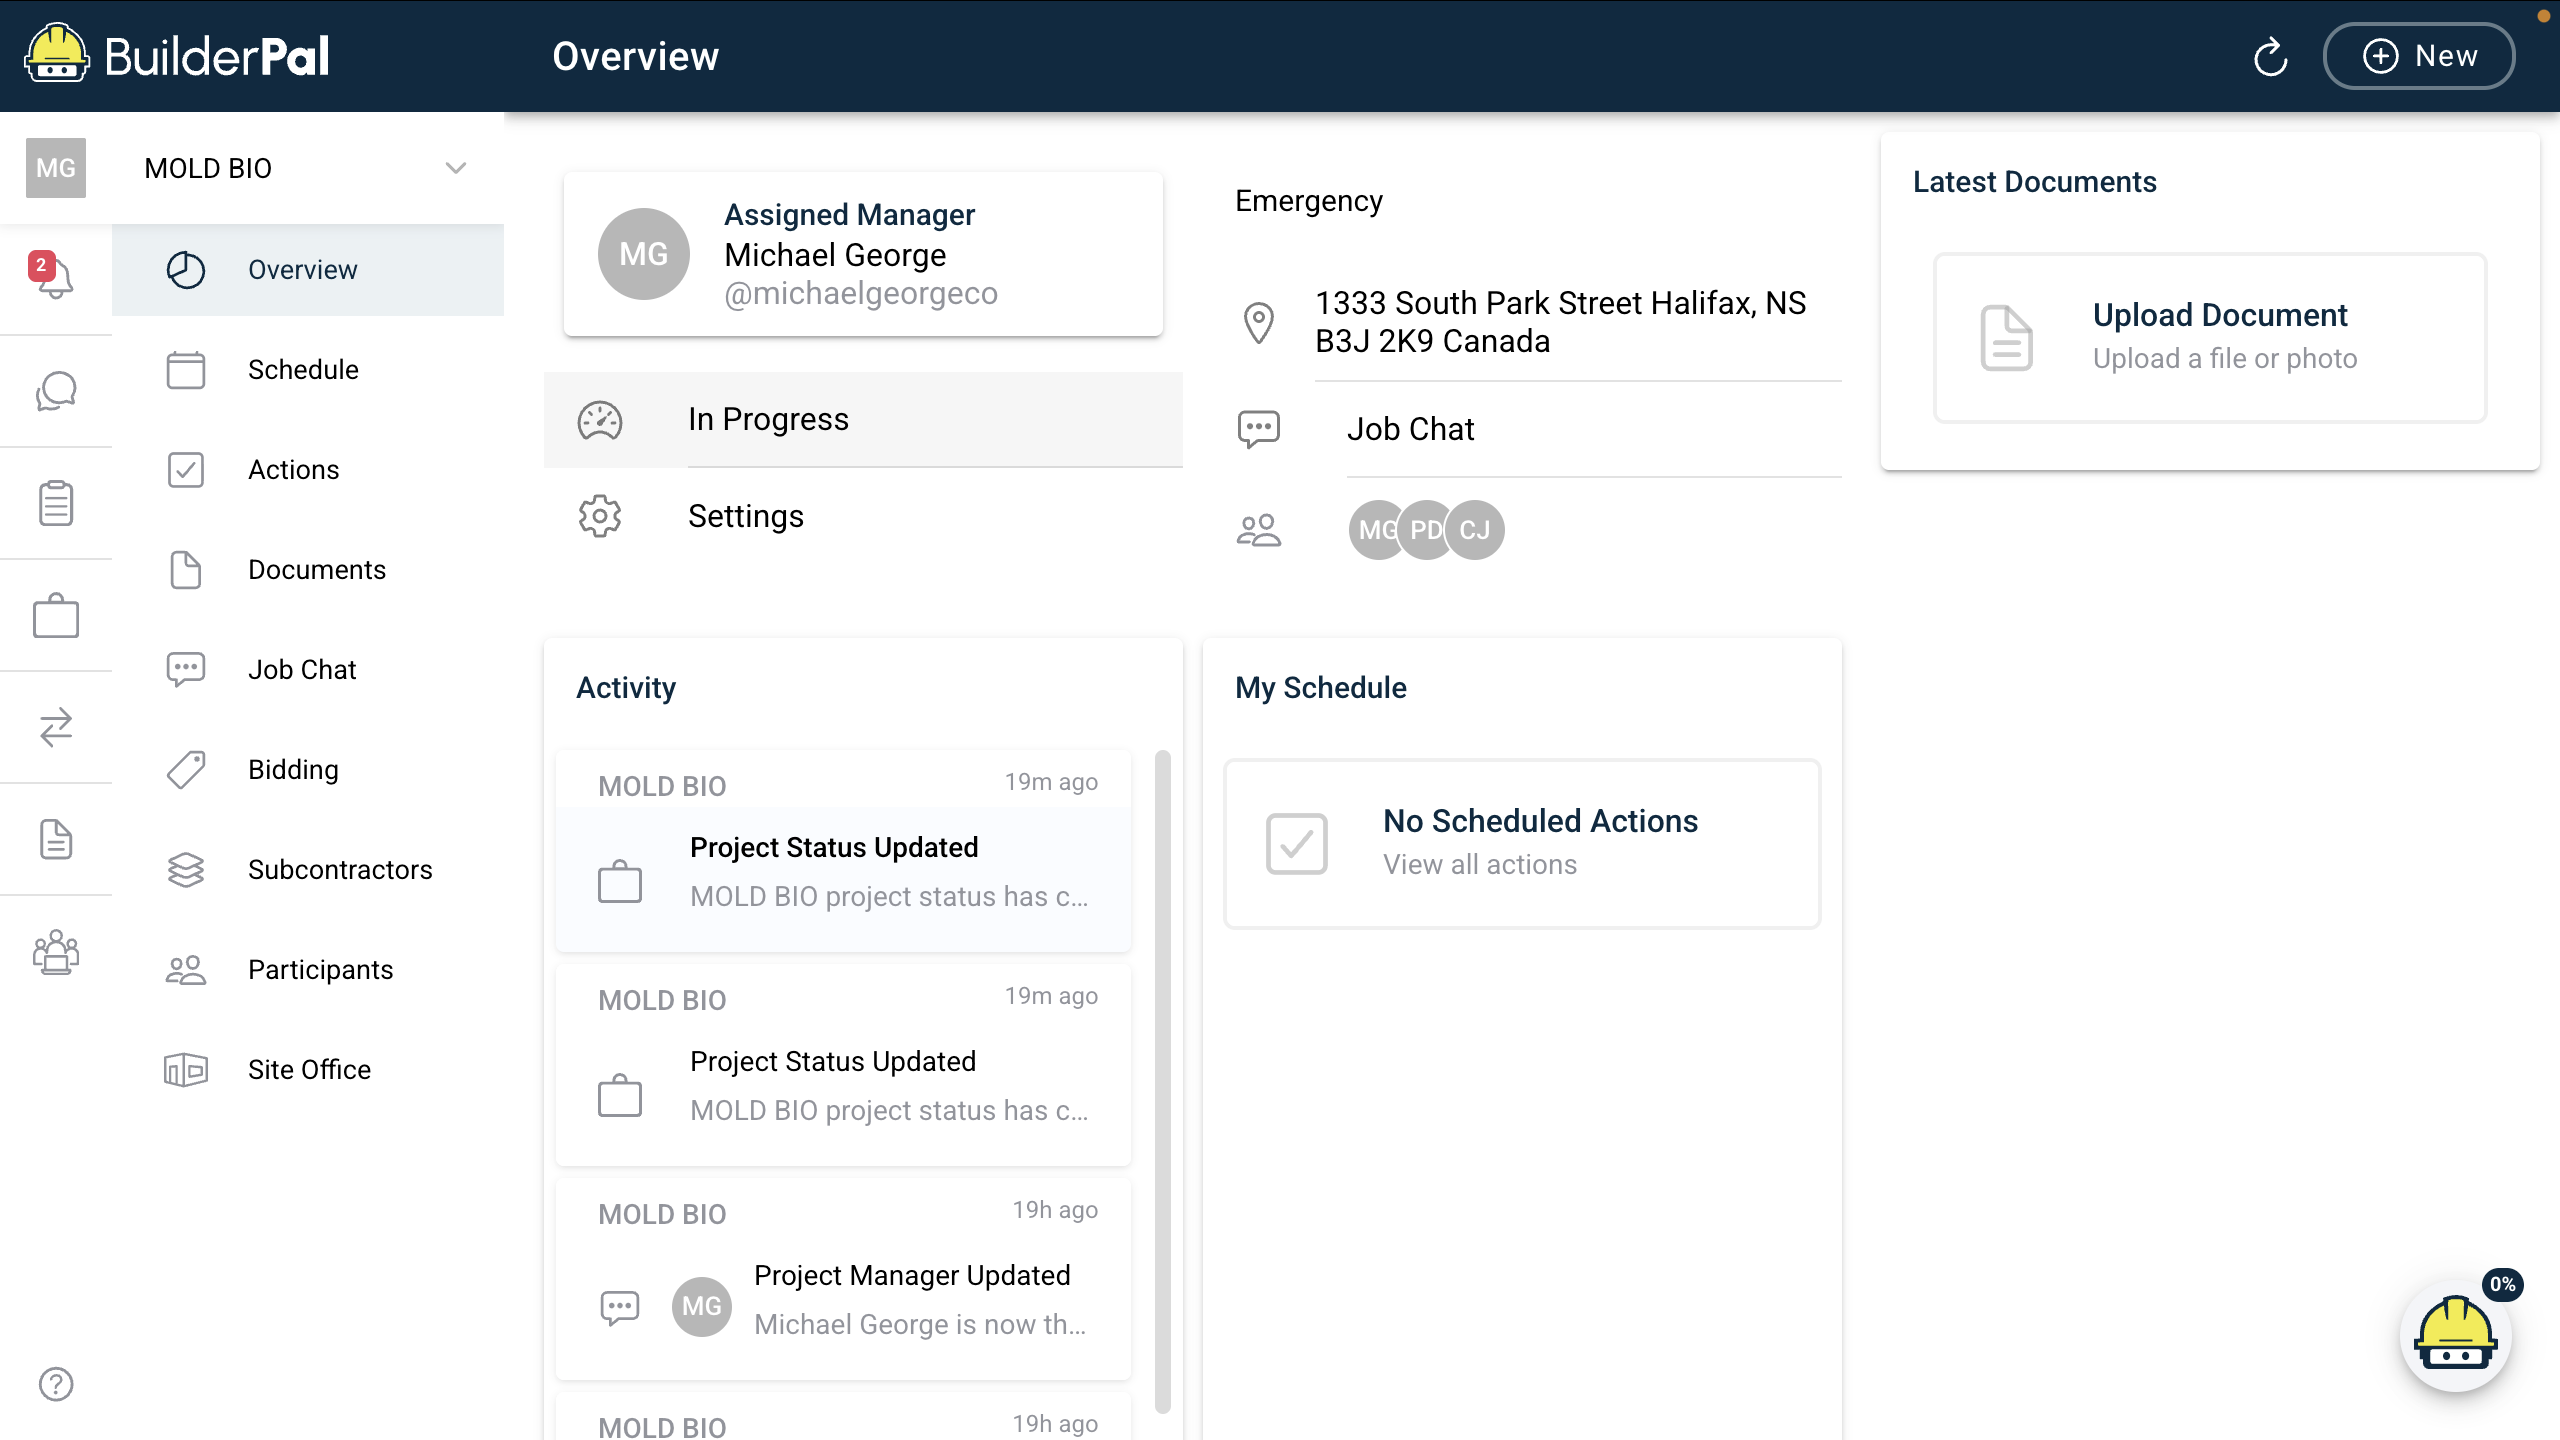
View the Overview Section
- Review the top section of the dashboard for project summary details such as:
- Status
- Timeline
- Budget overview
- Alerts or notifications
- Review the top section of the dashboard for project summary details such as:
-
Navigate Key Features
- Use the sidebar or tabs to access core sections, including:
- Tasks
- Documents
- Team
- Bids
- Timesheets
- RFIs / Submittals
- Click any section to drill into detailed views.

- Use the sidebar or tabs to access core sections, including:
-

Manage Tasks and Schedule Actions
- Open the Tasks section to:
- View open items
- Assign responsibilities
- Add new tasks
- Use filters to sort by priority or due date.
- Open the Tasks section to:
Tips
- Pro tip: Customize your dashboard view using filters in the Overview and Tasks sections to focus on what matters most to your role.
- Time saver: Bookmark the dashboard URL for quick access, or use the BuilderPal mobile app for on-the-go monitoring.
Related Articles
- Learn the Project Dashboard
- Manage Project Participants
- Navigate Your Projects
- Organize Your Projects
- Project Access Explained
- How to Create a New Project
Project Lifecycle Overview
Summary
The project lifecycle in BuilderPal represents the stages of a construction project from initiation to closeout, integrated with dashboard tools for monitoring and management. This overview explains how BuilderPal supports each phase to streamline workflows for contractors.
Why It Matters & How It Works
The problem it solves
Construction projects often span multiple phases and tools, making tracking messy. This lack of visibility can lead to missed steps, delays, and budget overruns.
Why it matters to contractors
BuilderPal’s project lifecycle ties everything together in one place. Real-time dashboard updates give teams clear visibility, reduce manual errors, and help everyone stay aligned and productive.
How it works (project lifecycle)
- Initiation: Set up the project and core details on the dashboard
- Planning: Manage bids, scopes, and tasks
- Execution: Complete work through actions and updates
- Monitoring: Track progress, alerts, and overall status
- Closeout: Archive the project and generate reports
Real-world example
For a renovation project, you’d start by creating the project on the dashboard, plan the work using bid packages, execute tasks in Actions, monitor progress in the Overview, and finish by uploading final documents and closing out the project.
 Related Articles
● Workflow / Tutorial: Learn the Project Dashboard
● Reference: Project Settings Reference
● Troubleshooting / FAQ: Dashboard Data Not Updating
Metadata
● Relevant Roles: Admin (GC), Admin (SUB), Admin (SHORTCUT), Team Project Manager, Team Member, Team Finance Manager, Team Business Manager, Team Supervisor
● Feature Area: Project Setup Basics
● Article Type: Concept / Overview
Manage Your Projects
Everything you need to control what happens inside a project — update details, manage participants, adjust settings, and understand project roles.
How Projects Relate to Subcontractors
Summary
In BuilderPal, subcontractors are directly tied to each project. Each one acts as a trade-specific workspace that connects planning, communication, documents, and bidding — all inside a single job.
This is what lets you break a complex build into clean, manageable scopes without losing structure.
Subcontractors Live Inside Projects
Every subcontractor belongs to a specific project.
They are not global company records or random contacts — they are project-based workspaces created for that job only.
For example, on a renovation project like:
16 Ave Farm House Renovation
You might create subcontractors for:
• Plumber • Electrician • Concrete Contractor • Drywall Installer • HVAC Tech
Each one is tied only to that project and its scope of work.
They Structure Work by Trade
Subcontractors organize your project by scope, not just by name.
This allows you to:
- Assign actions by trade
- Upload trade-specific documents
- Structure bid packages by scope
- Track progress by subcontractor
- Keep communication clean and separated
Instead of one giant task list, each subcontractor holds its own slice of the project.
They Exist Before Hiring Anyone
You don’t need to have a real contractor yet.
Subcontractors can be created early so you can:
- Start planning scopes
- Assign actions
- Upload documents
- Build bid packages
- Organize responsibilities
All before a real person or company is involved.
This means you can structure your entire project before awarding a single job.
They Connect Actions to Responsibility
Subcontractors aren’t just labels.
They define who the work is intended for.
When you assign actions to a subcontractor, those actions become part of that trade’s scope. Once you later award a contact, everything already assigned moves with that subcontractor automatically.
This keeps your planning intact even as real people get involved later.
They Power the Bidding Flow
Subcontractors are central to BuilderPal’s bidding process.
Each one can be used to:
- Create bid packages
- Send bid requests
- Compare estimates
- Award jobs
- Manage post-award communication
Once awarded, the subcontractor workspace becomes the contractor’s operational area for that job.
They Control Document Flow
Each subcontractor has its own document section.
This allows you to:
- Keep plans isolated by trade
- Control access per subcontractor
- Share only what they need
- Prevent cross-trade confusion
Documents stay grouped under the correct scope instead of floating loosely across the project.
They Influence Scheduling
Because subcontractors hold actions and assigned responsibilities, they naturally feed into:
- Scheduling
- Dependencies
- Workflow planning
- Timeline coordination
You’re timing scopes, not just individual people — which makes changes easier when crews change or availability shifts.
How Everything Ties Together
Think of it like this:
The Project is the container.
Inside it:
- Subcontractors define scopes
- Actions define work
- Documents define information
- Bids define pricing
- Awarded contacts define the people
Everything flows through the subcontractor structure.
Related Articles
Edit Project Details
Summary
Update your project settings, including status, assigned manager, address, and adding actions or documents to a project. This guide will show you how to customize project configurations and attach files as the job progresses.
Prerequisites
- Role or permission needed: Admin (GC), Admin (SUB), Admin (SHORTCUT), Team Project Manager, or Team Business Manager
- Setup required: Log in to BuilderPal and have an active project selected
Steps
-

Access the Projects Section and Open a Project
- From the main dashboard, click Projects.
- Select a project from the list
-
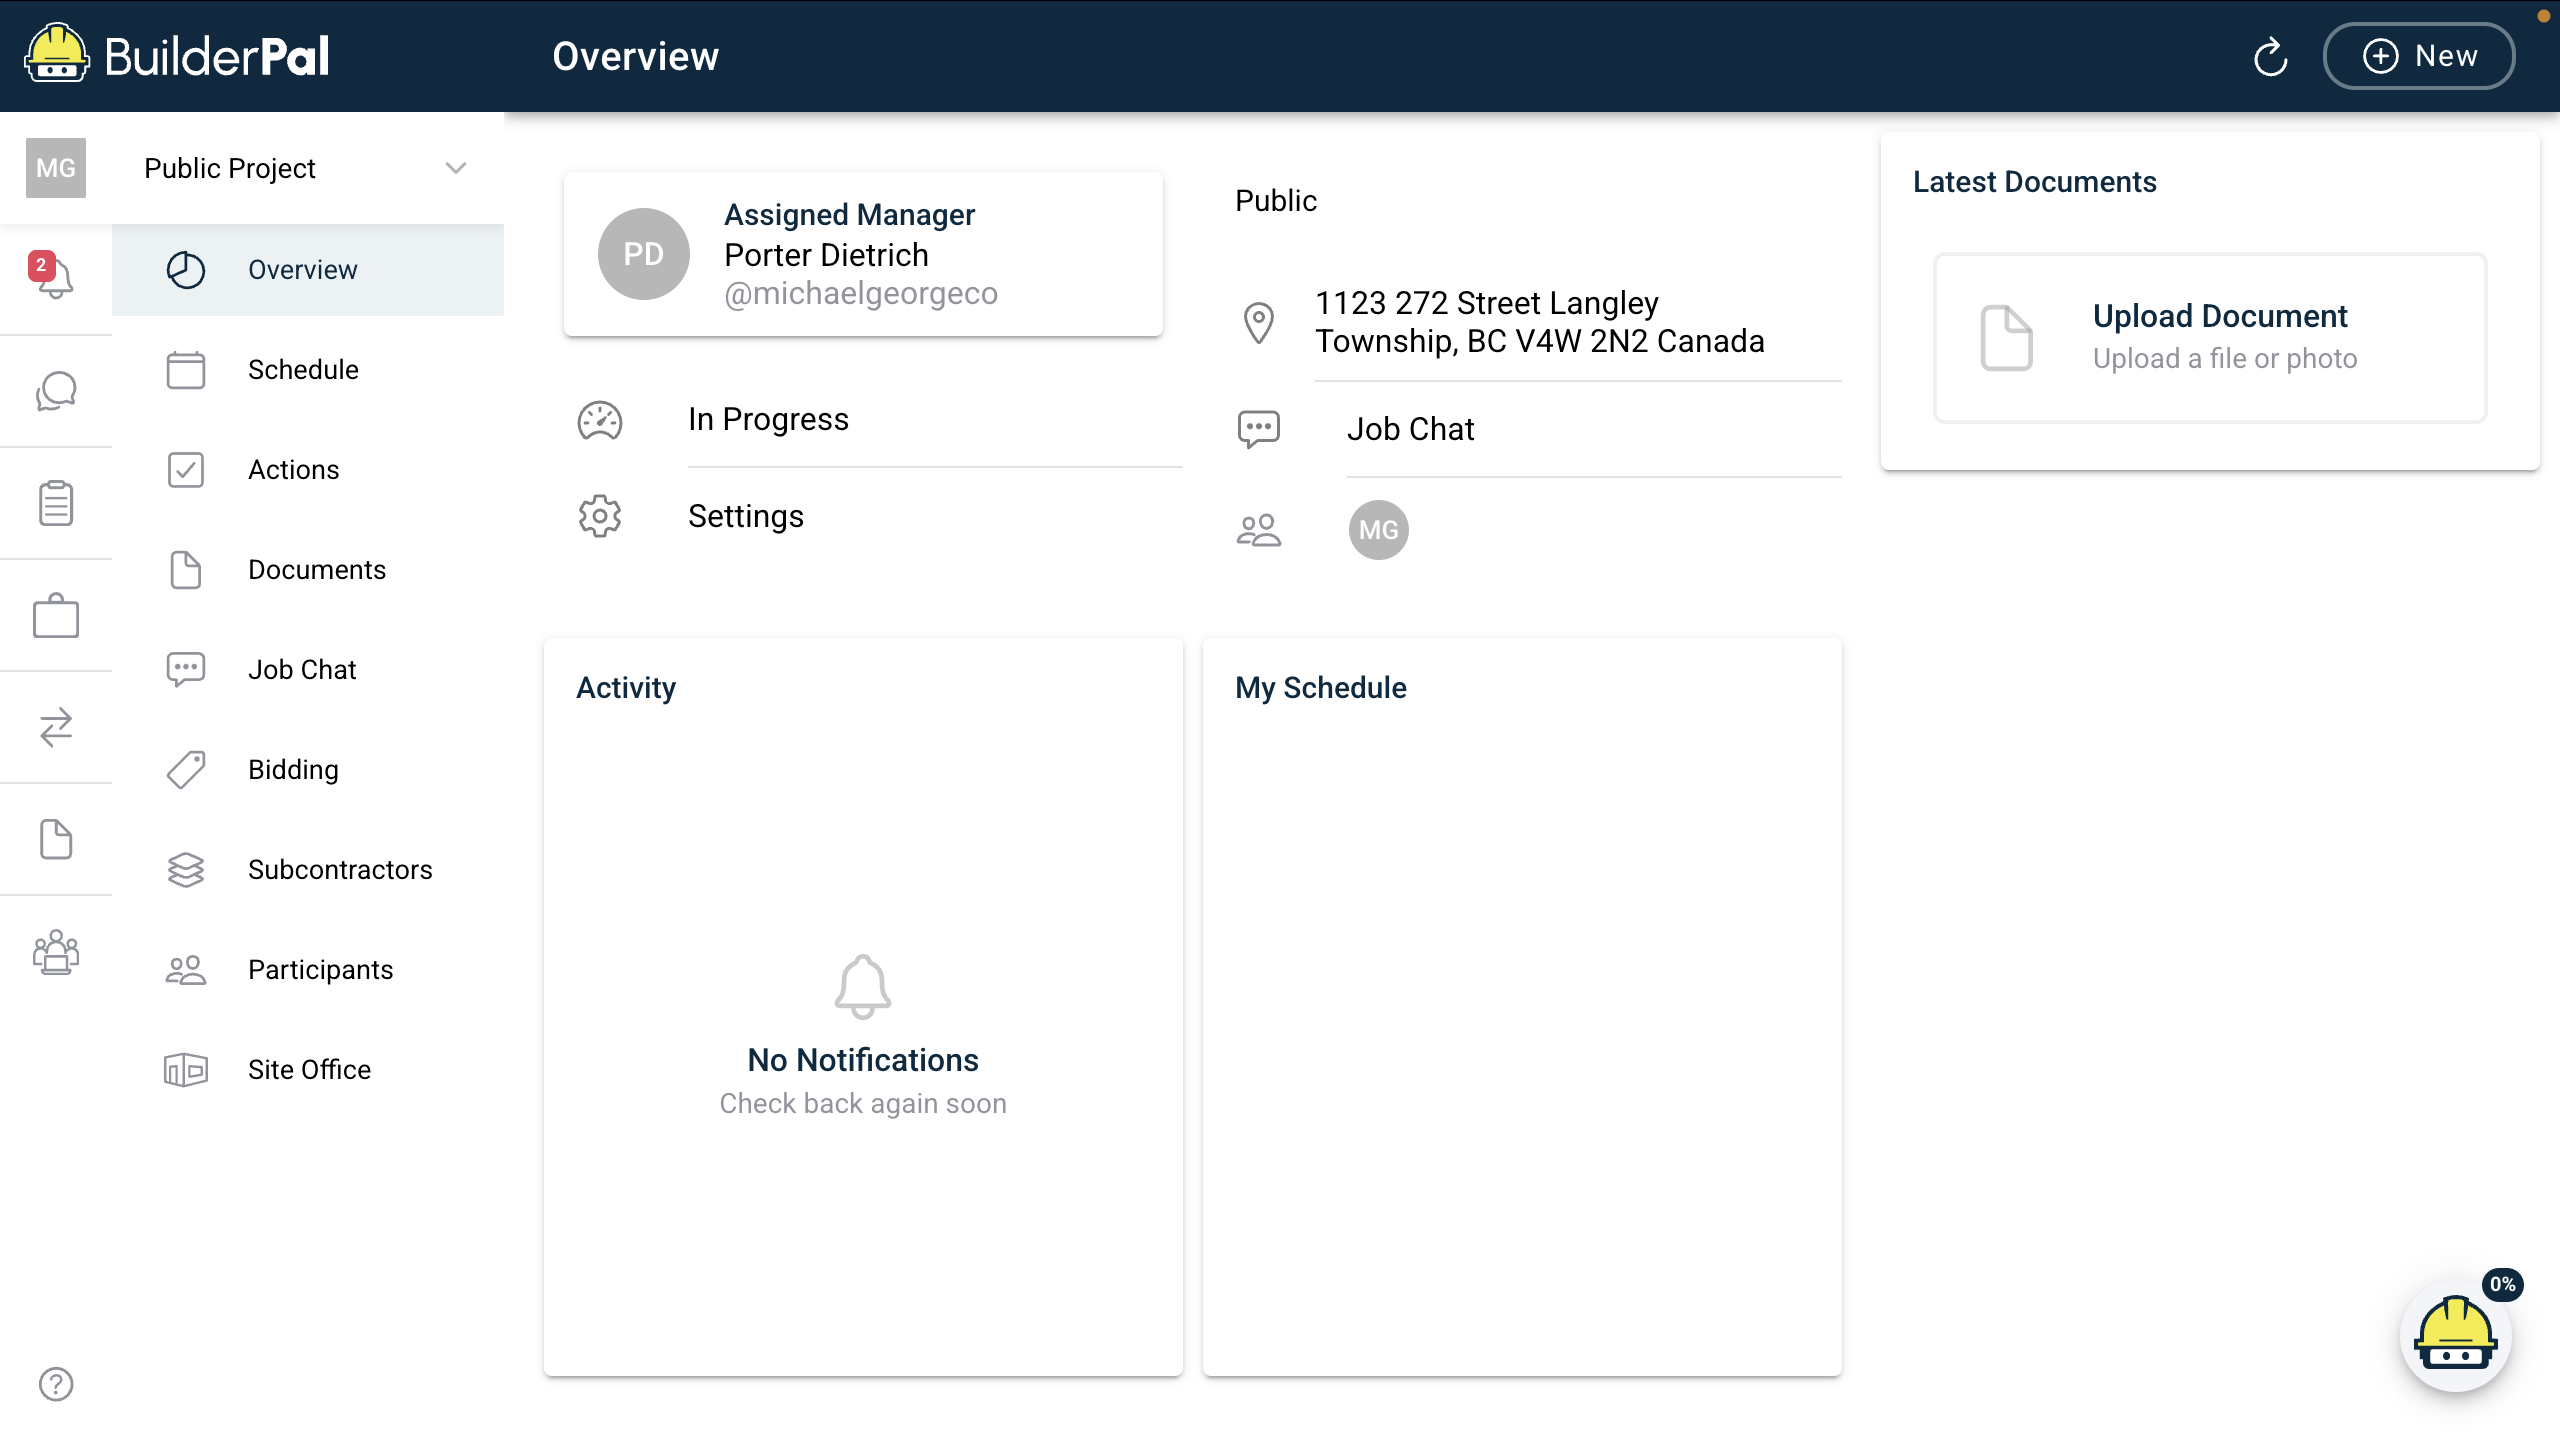
Update Project Status and Assigned Manager
- Click the current project status (e.g., In Progress).
- Select a new status (e.g., Planning).
- Click Assigned Manager.
- Select a manager (e.g., Porter Dietrich).
- Click Settings.
- Update the manager role as needed (e.g., Team Administrator).

- Click Save to apply the updates.
-

Edit the Project Address
- Click the project address (e.g., 1333 South Park Street, Halifax, NS B3J 2K9 Canada).
- Click Save to apply changes.
-

Add an Action
- Click View all actions.
- Click Add actions to your project.
- Select Scheduled Work.
-

Upload a Project Document
- Click Upload Document.
- Select Add file from project documents.
- Confirm to attach the document.
Tips
- Pro tip: Update notification settings in Settings to control email alerts for changes such as new actions or uploaded documents.
- Time saver: Use Job Chat to add actions and documents without navigating multiple menus.
Related Articles
Project Access Explained
Summary
This article explains how project access works in BuilderPal—who can see which projects, how team boundaries affect visibility, and how General Contractors and Subcontractors collaborate without ever sharing full project workspaces. Understanding these rules ensures your team knows exactly what each person can see and do inside BuilderPal.
Prerequisites
- You understand your team role (Admin, PM, Supervisor, etc.).
- You have access to at least one project.
How Project Access Works
Project access is determined by two separate systems:
- Your Role — defines what you can do inside a project
- Your Project Access — defines which projects you can open or see
These systems work together, but they are not the same.
A role does not grant visibility into every project—only into projects your team owns or ones you’ve been added to.
1. Projects Belong to Teams
Every project in BuilderPal is owned by a team, not an individual.
- Your GC organization owns GC-created projects
- Each subcontractor organization owns the subcontractor project automatically created when they are awarded work
- Internal Projects belong to your team
- Personal projects (My Tasks Workspace) belong only to the individual user
Because each organization owns their own projects:
Project access never crosses team boundaries unless shared through an Action.
2. Access Inside Your Own Team
Inside your company, your role determines visibility across your team’s projects.
Team Administrator
- Can see every project your team owns
- Can see all actions inside those projects
- Can manage roles, participants, settings, and financials
Project Manager
- Can see all projects owned by your team
- Can view and manage all tasks, schedules, and documents
Supervisors and Team Members
These roles can see:
- Projects they are added to
- Actions that are assigned to them
- Documents they have permission to view or upload
They cannot view projects they have not been invited into.
3. Cross-Team Access (GC ↔ Subcontractor)
When you hire a subcontractor and award a bid:
- A GC Project belongs to your team
- A Subcontractor Project belongs to the subcontractor’s organization
Even though these two projects are related:
What the GC Cannot See
- The subcontractor’s project dashboard
- Their internal actions, schedules, or documents
- Their financials, budgets, or estimates
- Their Site Office or Reports
- Their participants list
What the GC Can See
- Punch Lists
- RFIs
- Change Orders
- Purchase Orders & Bills
- Submitted documents
- Status updates
This ensures clean collaboration without exposing internal project data.
4. How Information Flows Between Teams
Projects are private.
Actions are shared.
Actions act as the “bridge” between GC and subcontractor teams.
Each team can see:
- The actions assigned to them
- The comments and files inside those actions
- PO/Bill submissions
- Linked estimate/budget values after they are submitted
Each team cannot see:
- Each other’s project workspaces
- Each other’s internal tasks or schedules
- Any private documents not shared through an action
- Any financials belonging to the other team
This mirrors real construction workflows—each company maintains its own internal job folder while collaborating through structured requests and deliverables.
5. Subcontractor Projects
When a subcontractor is awarded work, they receive a full private project, including:
- Their own estimate & budget
- Their own schedule and tasks
- Their own documents
- Their own financial center
- Their own Site Office
- Their own reports
The GC cannot open or browse this project.
GC visibility into Subcontractor work:
- ✔ Assigned actions
- ✔ Submitted POs/Bills (through the action thread)
- ✔ Uploaded files within those actions
- ✔ Status updates
- ❌ Not their project contents
6. Upstream vs Downstream Assignments
Assignment direction controls visibility:
GC → Subcontractor (Downstream)
- GC sees everything related to the assigned action
- Subcontractor sees only that action—not the GC project
- Subs cannot assign tasks back upstream to the GC
Subcontractor → GC (Upstream)
- Subcontractors cannot originate upstream assignments
- They can only respond inside actions the GC created
This prevents upstream task creation and keeps responsibilities clear.
7. My Tasks Workspace vs Assigned Work
My Tasks Workspace is a private personal project that belongs only to you.
It does not belong to your team, and even Admins cannot open it unless you invite them.
Inside My Tasks:
- You see only the tasks you create yourself
- Only participants you manually invite can access it
- It does not show all tasks assigned to you across BuilderPal
- It does not inherit any team-level visibility rules
- It functions as your own personal workspace inside BuilderPal
To see tasks assigned to you across all projects, use your To-Do List, not My Tasks.
FAQ
Can Admins see all projects?
Admins can see all projects owned by their own team, but cannot access subcontractor-owned projects or personal My Tasks projects unless invited.
Can subcontractors see my GC project?
No. Subcontractors only see actions assigned to them, not your full project workspace.
Do POs and Bills sync between GC and Sub projects?
Yes—because they are Actions. The action thread manages visibility, not the project itself.
Can subcontractors assign actions to the GC?
No. Work only flows downstream from GC → Sub.
Why can’t I see a project someone mentioned?
You must either:
- be added as a participant, or
- be part of the team that owns that project, or
Related Articles
- Manage Project Participants
- Upstream vs Downstream Assignments
- Sharing & Visibility Rules
- Roles & Permissions Overview
- Subcontractor Project Permissions & Visibility
Project Settings Reference
Summary
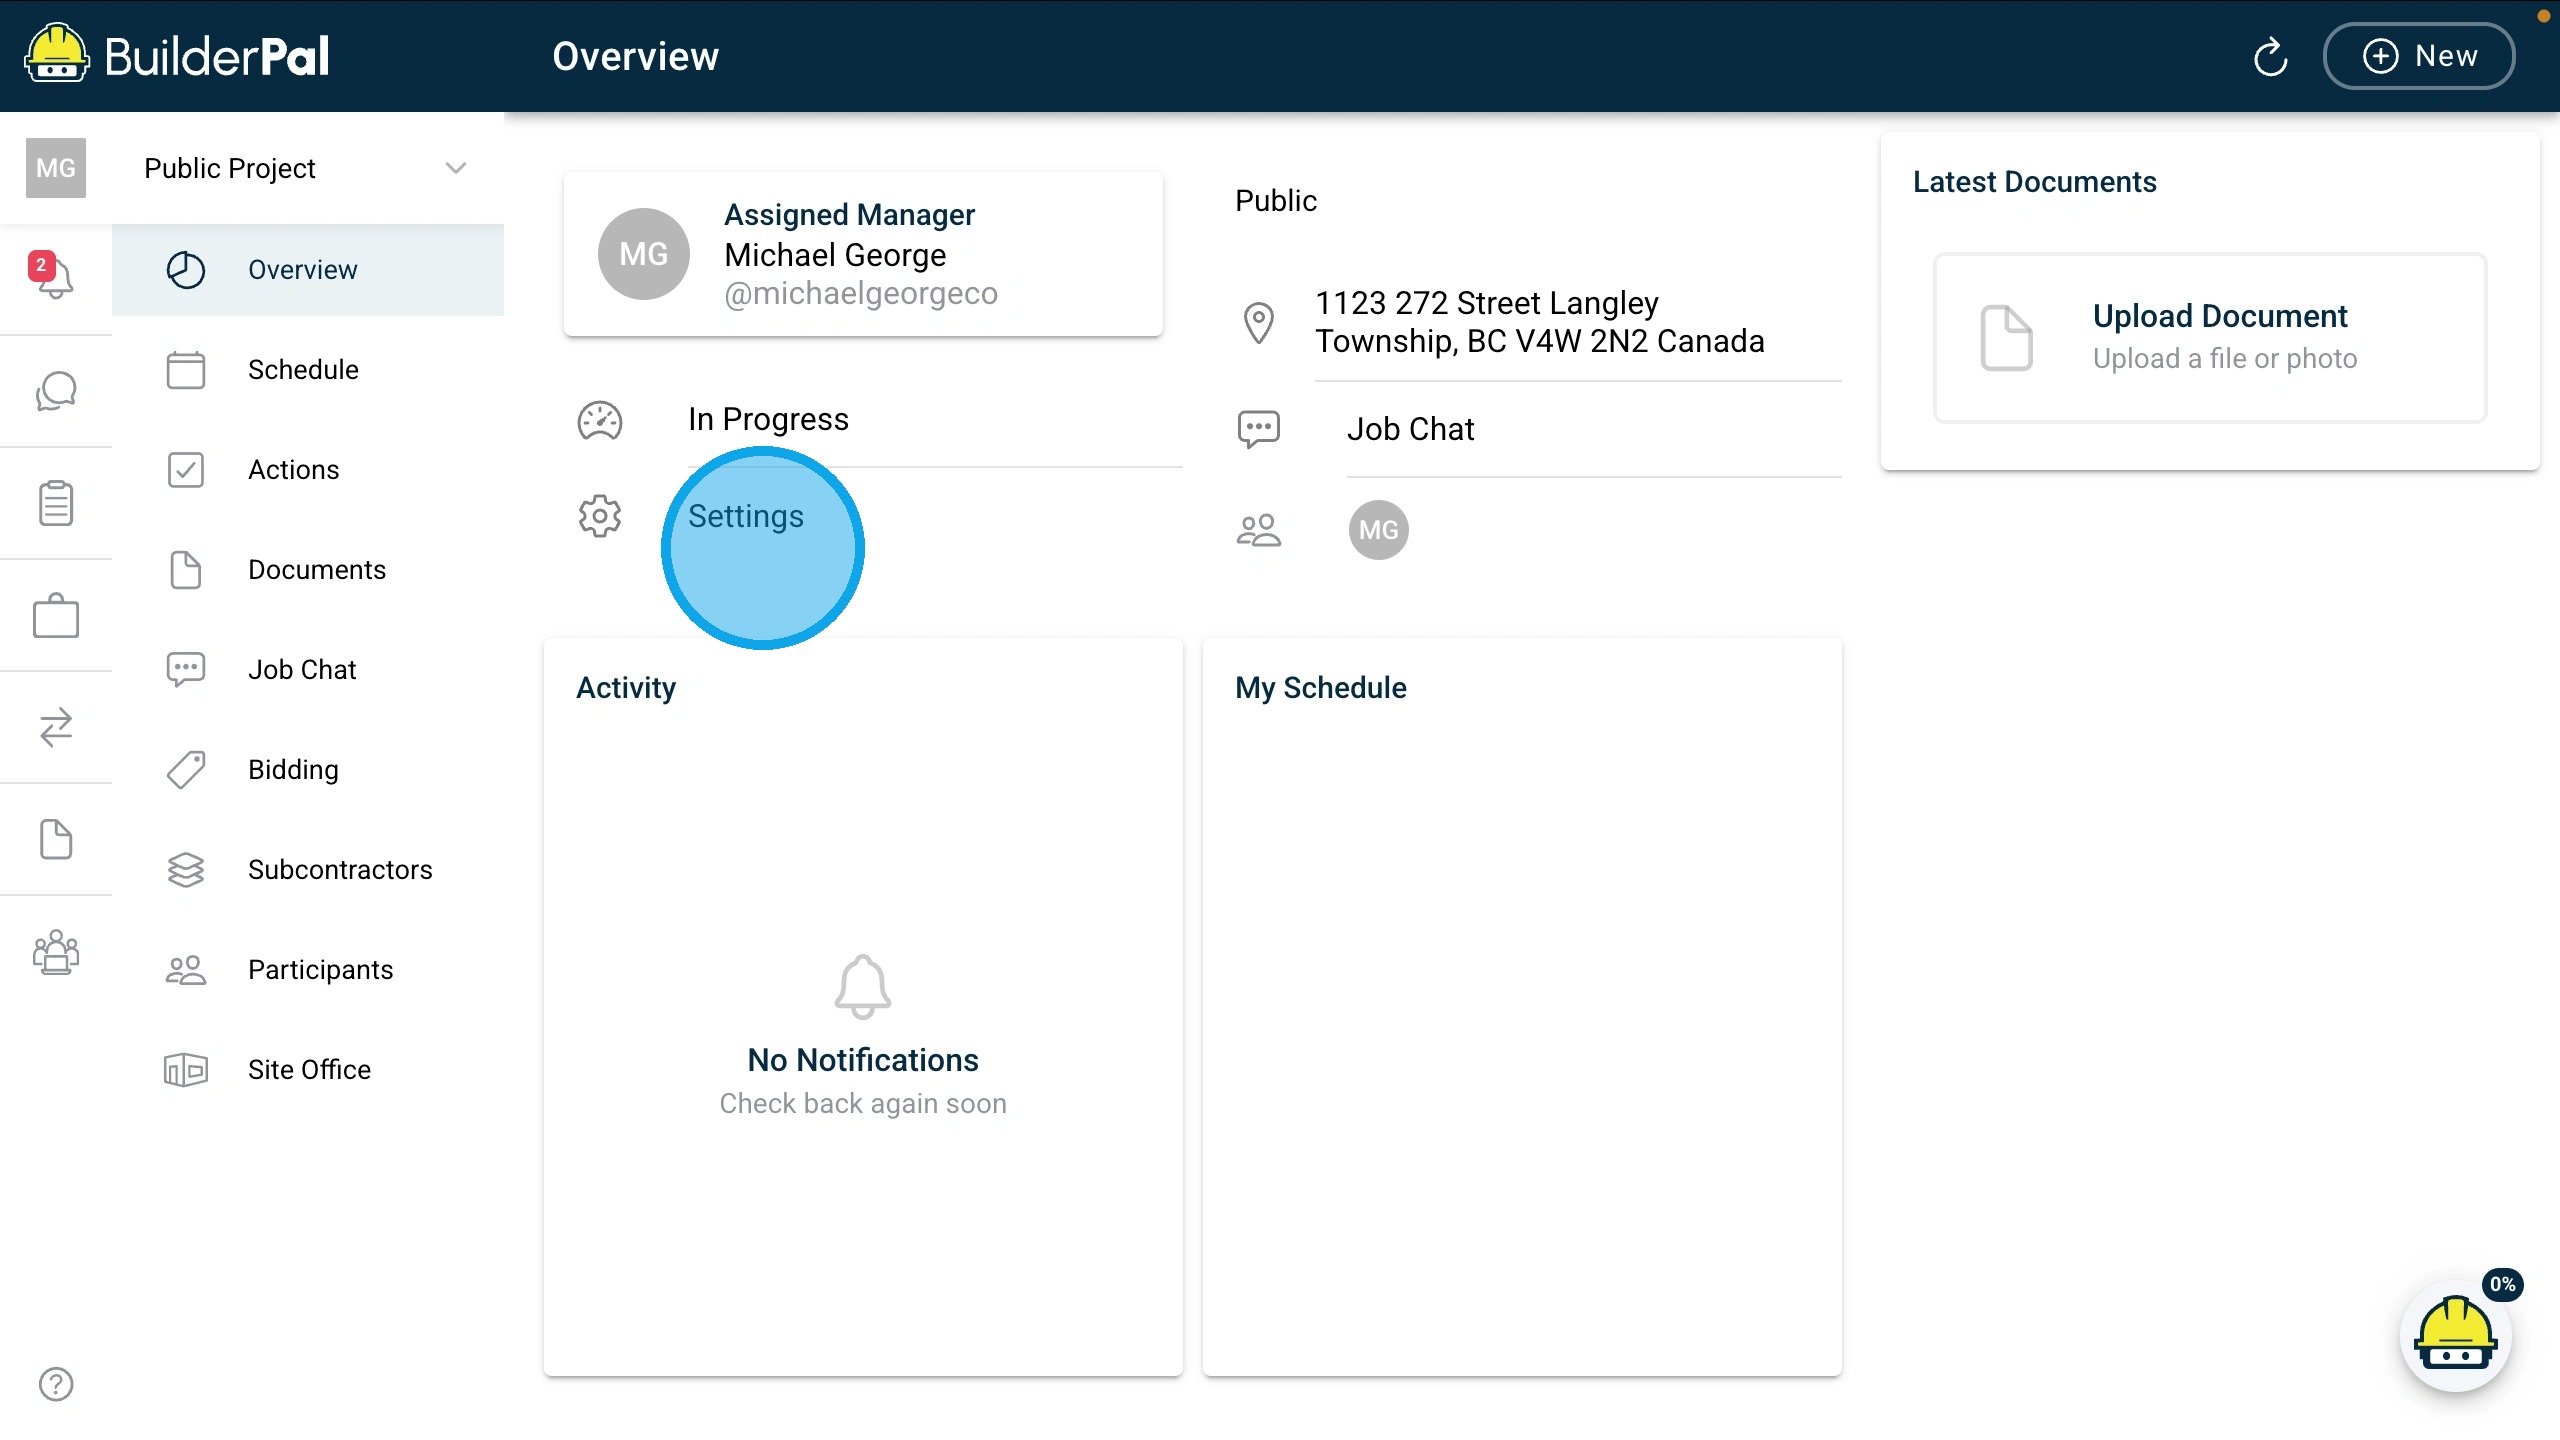
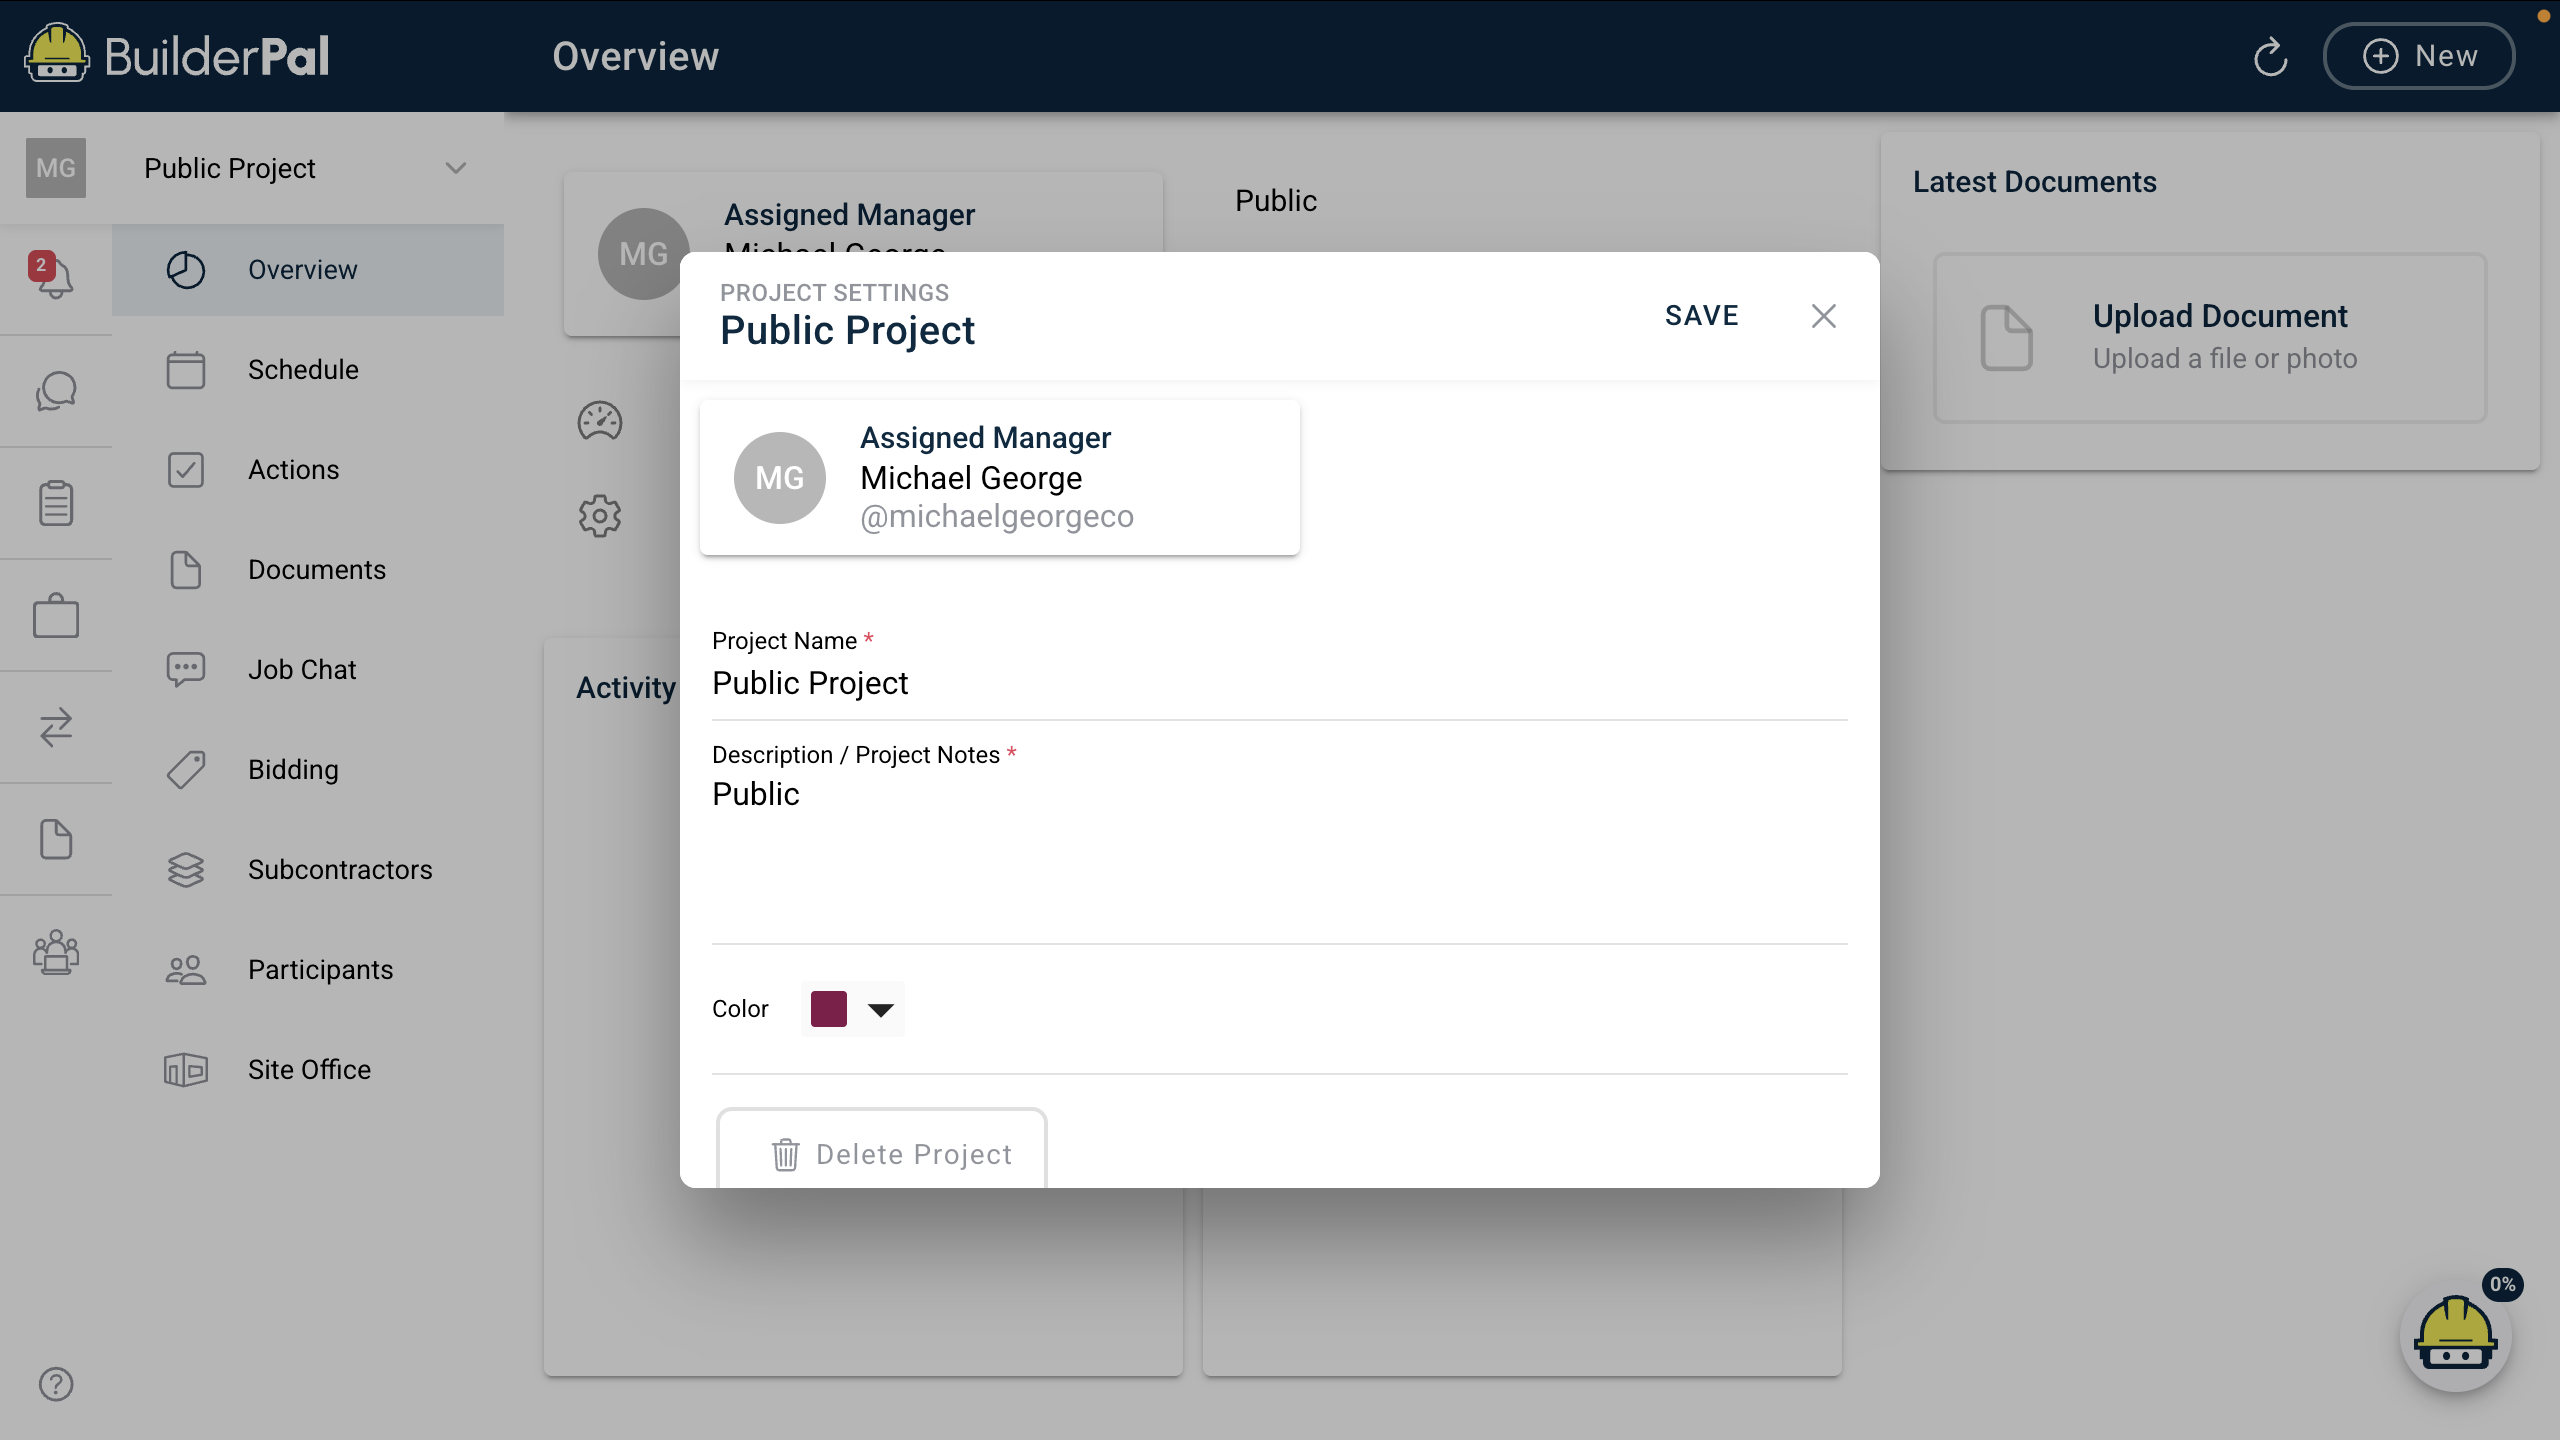
This reference covers the fields and options available in the Project Settings modal of BuilderPal, allowing users to edit core project information like name, manager, description, and color.
Key Details
● Definition/description: Project Settings is the modal accessed from the dashboard for updating project metadata, manager, and appearance without affecting tasks or documents.
● Field or option meanings: Fields control project identification, leadership, notes, and visual tagging; see table for details.
● Role requirements: Editable by admins and project managers; view-only for other team roles.
Table or List of Values
| Item | Description | Notes |
|---|---|---|
| Assigned Manager | The user responsible for overseeing the project. | Dropdown of team members; changing sends notification. Example: "Michael George @michaelgeorgeco". |
| Project Name | The primary name of the project. | Required; used in lists and headers. Example: "Public Project". |
| Description / Project Notes | Additional details or notes about the project. | Optional text field for internal reference. Example: "Reno project notes". |
| Color | A color tag for visual identification in lists. | Dropdown of colors; helps with quick scanning. Example: Purple square. |
| Delete Project | Button to permanently remove the project. | Use with caution; deletes all associated data. No example (destructive action). |
Related Articles
- Workflow / Tutorial: Edit Project Details
- Concept Overview: Project Lifecycle Overview
- Troubleshooting / FAQ: Dashboard Data Not Updating
Manage Project Participants
Summary
This tutorial covers how to add team members to a project by opening the participants window, searching for users, and saving changes. It helps ensure the right people have access for collaboration and task assignment.
Prerequisites
● Role or permission needed: Admin (GC), Admin (SUB), Admin (SHORTCUT), Team Project Manager, or Team Business Manager.
● Any setup required: Log in to BuilderPal and open an active project from the Projects menu.
Steps

- Open your Project from the Projects menu and click on the participants located on the right, beneath Job Chat.
2. Opening the Participants window will show all team members currently on the Project. Searching and selecting team members will then add them to the Project, then close the window.
3. Click "Save" to add the newly selected members to the Project.
Confirmation
“You’ll know it worked when the participant list updates with the new members, and they receive an invitation or notification email.”
Tips
● Pro tip or best practice: Review the team list after saving to confirm roles and access levels are correct for security.
● Shortcut or time saver: Use the search field to quickly find existing company members instead of typing full emails.
Related Articles
● Concept Overview: Roles & Permissions
● Reference: Project Access Explained
● Troubleshooting: Participant Not Receiving Invite
Sharing & Visibility Rules
Summary
Sharing & Visibility Rules define who can see what inside BuilderPal—across projects, documents, tasks, and communication. BuilderPal keeps each team’s internal work private while surfacing only the information required for collaboration between General Contractors (GCs) and Subcontractors.
Why It Matters
The problem: Construction teams need structured collaboration, not oversharing. GCs must coordinate multiple trades, while subcontractors must protect their internal workflows and documents.
The benefit: BuilderPal creates a clean separation between teams while automatically surfacing the information needed to work together—reducing confusion, preventing oversharing, and keeping every team in control of its own work.
How It Works
1. Project Ownership
BuilderPal uses project ownership to determine what each team can see.
GC-Owned Projects
The GC’s team can see:
- All GC-owned projects
- All tasks, documents, schedules, and job chats within those projects
- All subcontractor surface-level documents (not the sub’s full project)
Subcontractor-Owned Projects
Created automatically when the GC awards a subcontract.
GC teams:
- Cannot open the subcontractor’s project
- Only see surfaced information relevant to the subcontracted scope
- Cannot see the sub’s schedule, internal tasks, or documents not uploaded by the sub
Subcontractor teams:
- Do not see the GC’s full project
- Only see the tasks and documents that the GC assigns or shares
2. What Subcontractors Can See
Subs can see:
- Tasks assigned to them by the GC
- Tasks created inside their subcontractor project
- Files the GC shares downward
- Their private GC↔Sub job chat
- The optional general project chat (if they choose to join)
Subs cannot see:
- The GC’s project
- Other subcontractors
- GC internal schedules, documents, or communication
- The GC’s team members unless shared on an action
3. What the GC Can See From Subcontractors
GCs cannot access the subcontractor’s actual project.
Instead, BuilderPal surfaces the subcontractor’s uploads into:
A. GC Project → Subcontractors Page → Documents Module
Shows:
- Files uploaded by the subcontractor into their own project
- Files the GC has shared with them
B. GC Project → Documents → Subcontractors Folder
One folder per subcontractor, containing:
- All documents the sub uploaded (surfaced)
- Any GC-shared documents
GCs cannot see:
- The subcontractor’s internal tasks
- The subcontractor’s project schedule
- The subcontractor’s internal documents unless uploaded through their project
4. Document Sharing Rules
When Subs Upload Documents
Subs upload into their subcontractor project, not into the GC’s folders.
BuilderPal then automatically mirrors their documents upstream into:
- GC Project → Subcontractors module
- GC Project → Documents → Subcontractors folder
Subs never upload into:
When GCs Share Documents
5. Schedule Visibility
Subcontractors See:
- Only tasks assigned to them
- Tasks they’ve created inside their subcontractor project
Subs do not see:
- GC’s full schedule
- Other trades
- GC sequencing unless manually exported and shared
GC Sees:
- All GC tasks
- All tasks assigned to subcontractors
- Any sub-created tasks that fall within their subcontractor project scope
6. Job Chat Visibility
Each subcontractor has:
A. A private GC ↔ Sub chat channel
- Exclusive to the GC team and that subcontractor’s team
- Used for scope-specific questions, updates, files
B. A general project chat channel (optional for everyone)
- No one is auto-added
- GC team and subs may join if they choose
Subs cannot access:
- GC-only channels
- Other subcontractor channels
7. Task & Activity Visibility
Subcontractors Can See:
- Tasks assigned by the GC
- Tasks they create themselves
GCs Can See:
- All GC tasks
- Tasks assigned to subcontractors
- Tasks subcontractors create as part of their subcontracted work
GCs cannot see:
- Internal subcontractor tasks inside the subcontractor project unless surfaced
8. My Tasks Workspace Visibility
The My Tasks Workspace is personal to each user.
- Belongs to the user, not the team
- GC Admins cannot see anyone else’s My Tasks Workspace
- Subcontractors cannot see GC workspaces
- Only tasks assigned to you or created by you appear here
It functions as a personal organizational dashboard—completely private unless you choose to invite someone.
Real-World Example
- A GC awards a plumbing subcontract.
- BuilderPal creates a Plumber Subcontractor Project (owned by the plumber).
- The GC assigns tasks to the plumber.
- The plumber uploads drawings → they surface automatically into the GC’s subcontractor folders.
- The GC shares updated site drawings → they appear in the plumber’s Shared From Contractor folder.
- Both teams communicate in the private GC↔Plumber chat channel.
- No team sees information unrelated to their scope.
When to Use This Article
Use these rules when you need to understand:
- Why subcontractors cannot see the full project
- Why GC cannot open subcontractor projects
- Where subcontractor files show up for the GC
- How tasks and schedules stay separated yet coordinated
- How job chat channels are structured
Related Articles
- Project Access Explained
- How Projects Relate to Subcontractors
- Permissions & Participants in Actions
- Attaching Documents
Navigate & Organize Your Projects
Find and organize your projects from the main project list — learn how to sort, search, clean up old jobs, and move quickly between the work you manage.
Navigate Your Projects
Summary
This tutorial covers the basics of finding, filtering, and switching between projects in BuilderPal. It helps you quickly access the right project dashboard and organize your list using filters for efficient management.
Prerequisites
● Role or permission needed: Any team member with access to projects (e.g., Admin GC, Team Project Manager, Team Member).
● Any setup required: Log in to your BuilderPal account.
Steps
-


Access the Projects List
○ From the main dashboard, click the Projects tab in the sidebar to view all your accessible projects.
-

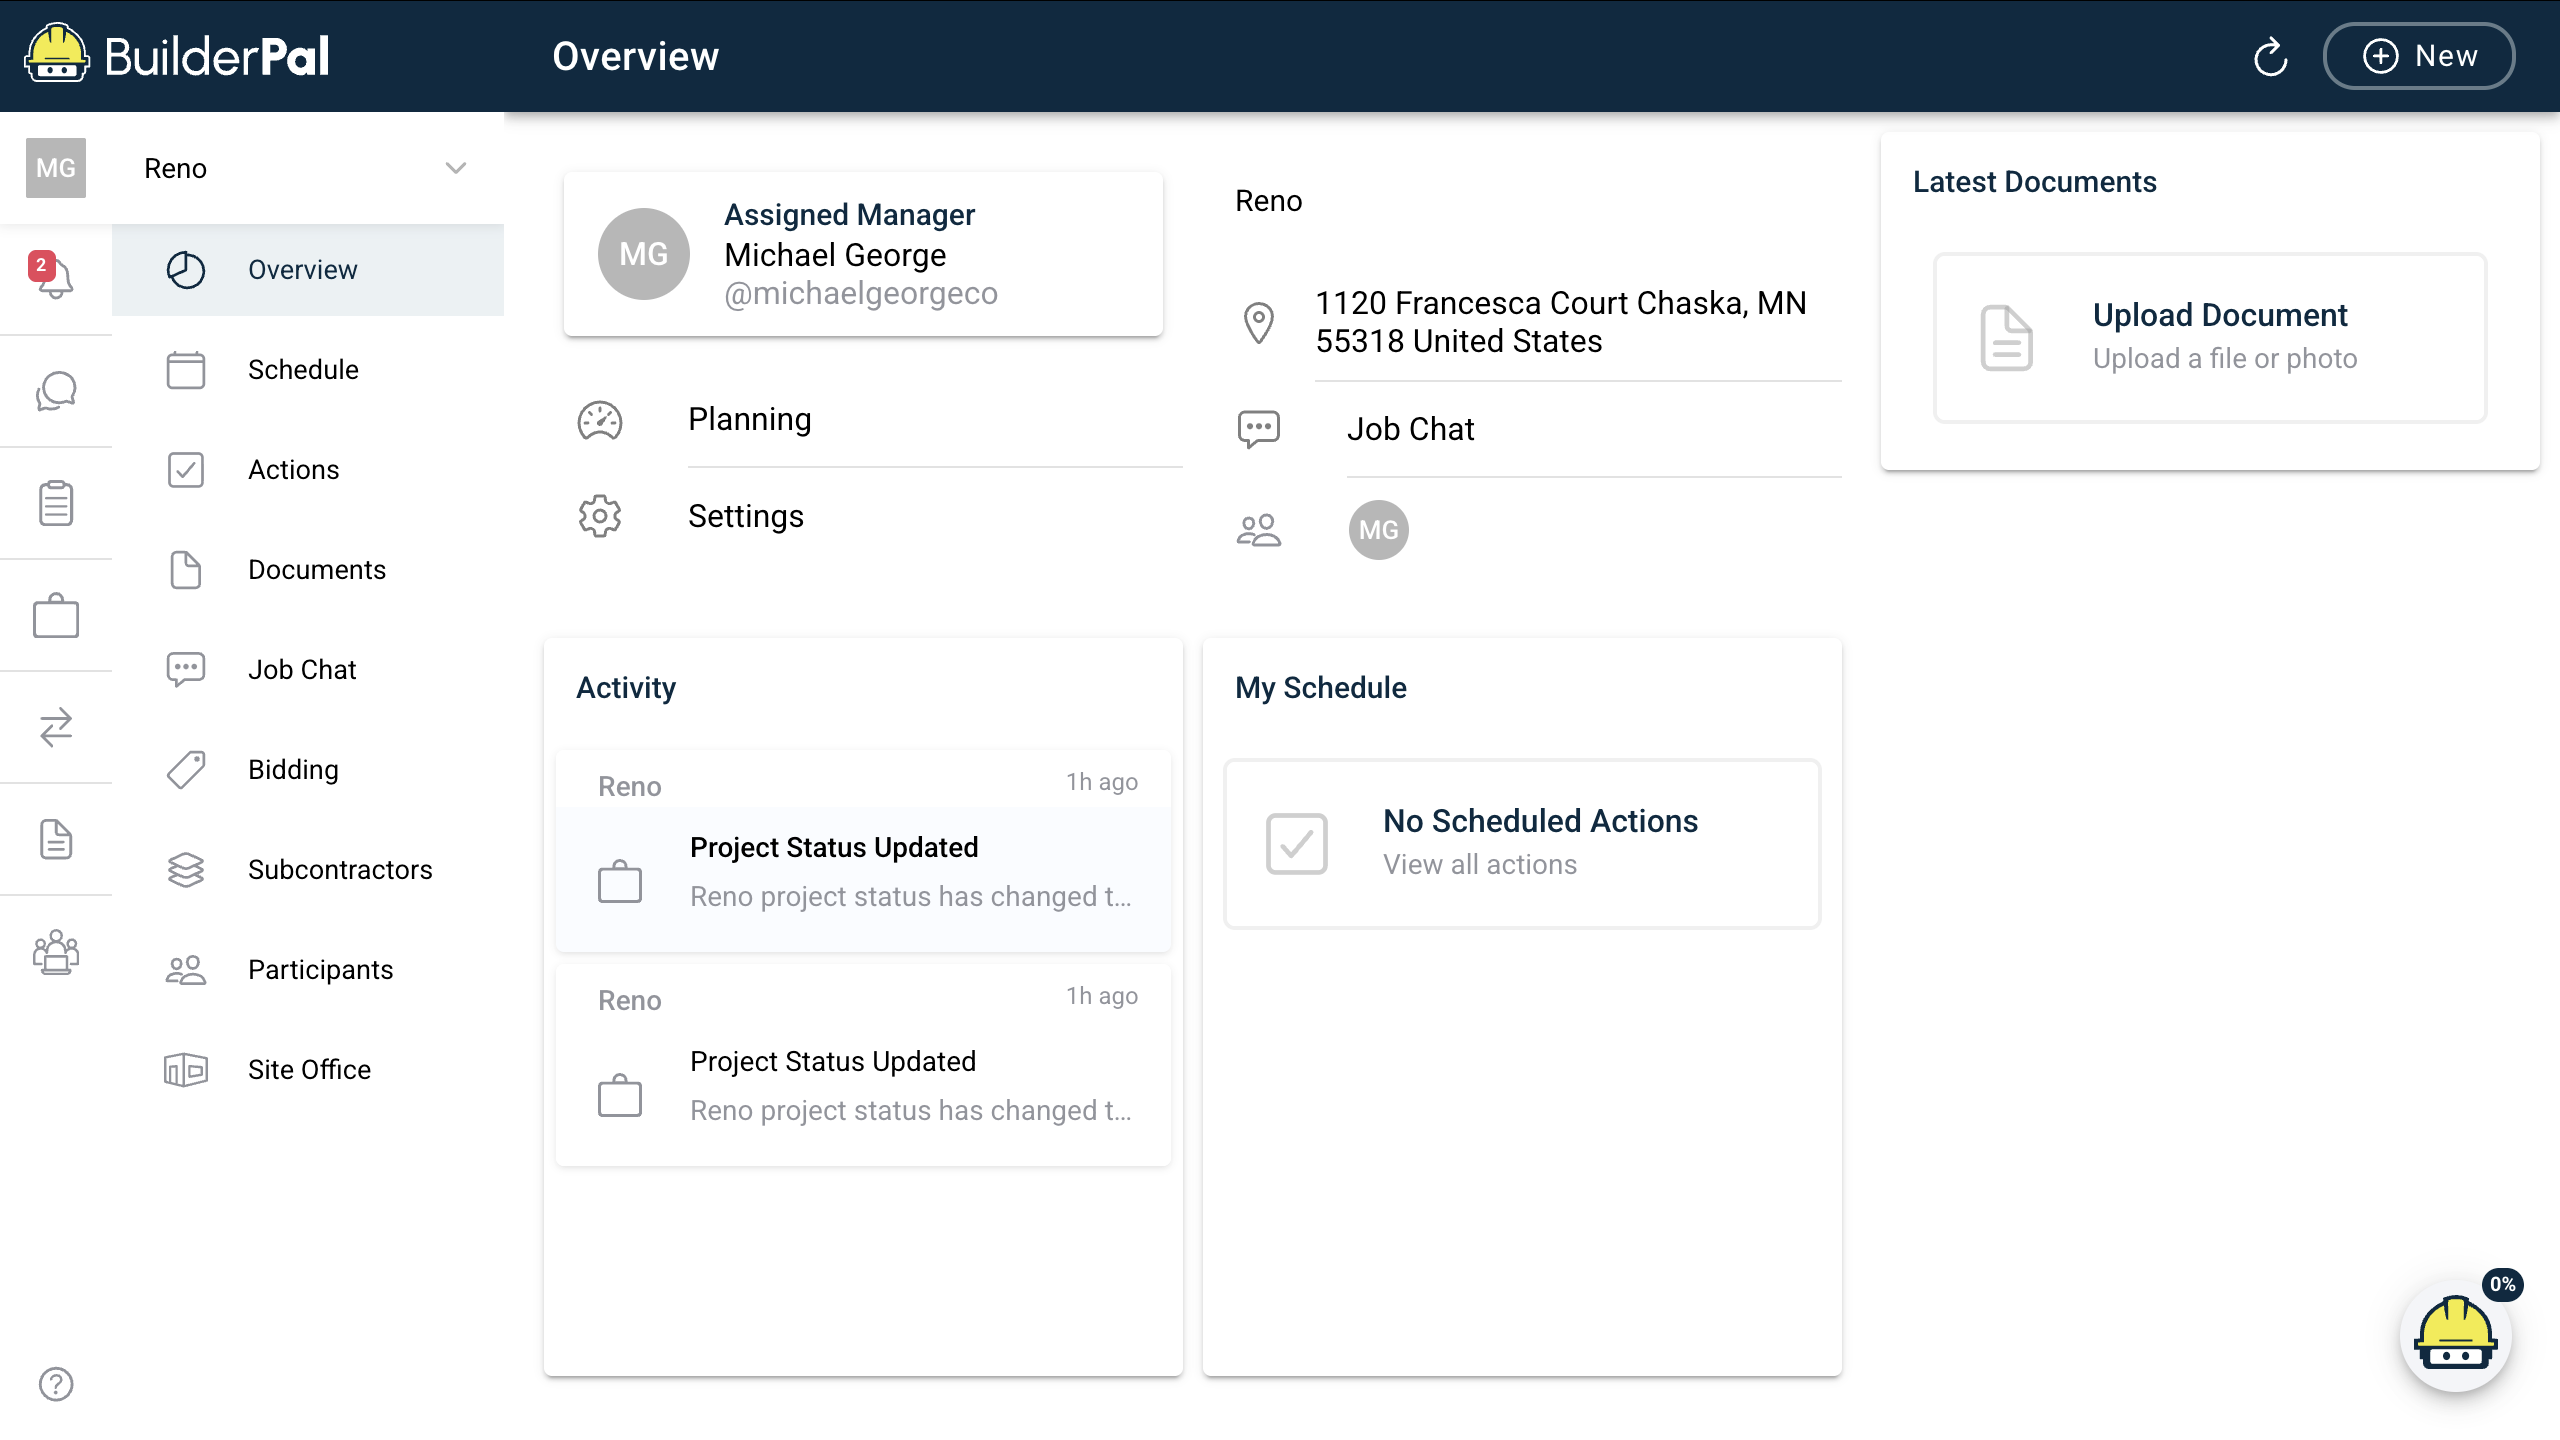
Apply Filters to Organize
○ Click "Filters" at the top, select criteria like status (e.g., "Planning") or date, then click "Apply" to sort and group the list.
Tips
● Pro tip or best practice: Use status filters like "Planning" to focus on active phases, and combine with date ranges for better organization.
● Shortcut or time saver: Bookmark frequently accessed projects or use the search bar for quick navigation without full filtering.
Related Articles
● [Concept Overview: Project Lifecycle]
Organize Your Projects
Summary
This tutorial shows how to organize your projects by updating location types, editing project status, and using filters to sort and group them. It helps keep your project list clean, searchable, and easy to manage as your workload grows.
Prerequisites
- Role or permission needed: Any team member with access to projects (e.g., Admin GC, Team Project Manager, Team Member).
- Any setup required: Log in to BuilderPal and have one or more active projects.
Steps
-

Access the Projects List
○ Instruction: From the main dashboard, click the Projects tab in the sidebar to view all your accessible projects.
-

Edit/Change Location Type
○ Select a project, click on the Address, then change your Address location type (e.g., "Residential", "Commercial", "Industrial") and save.
-
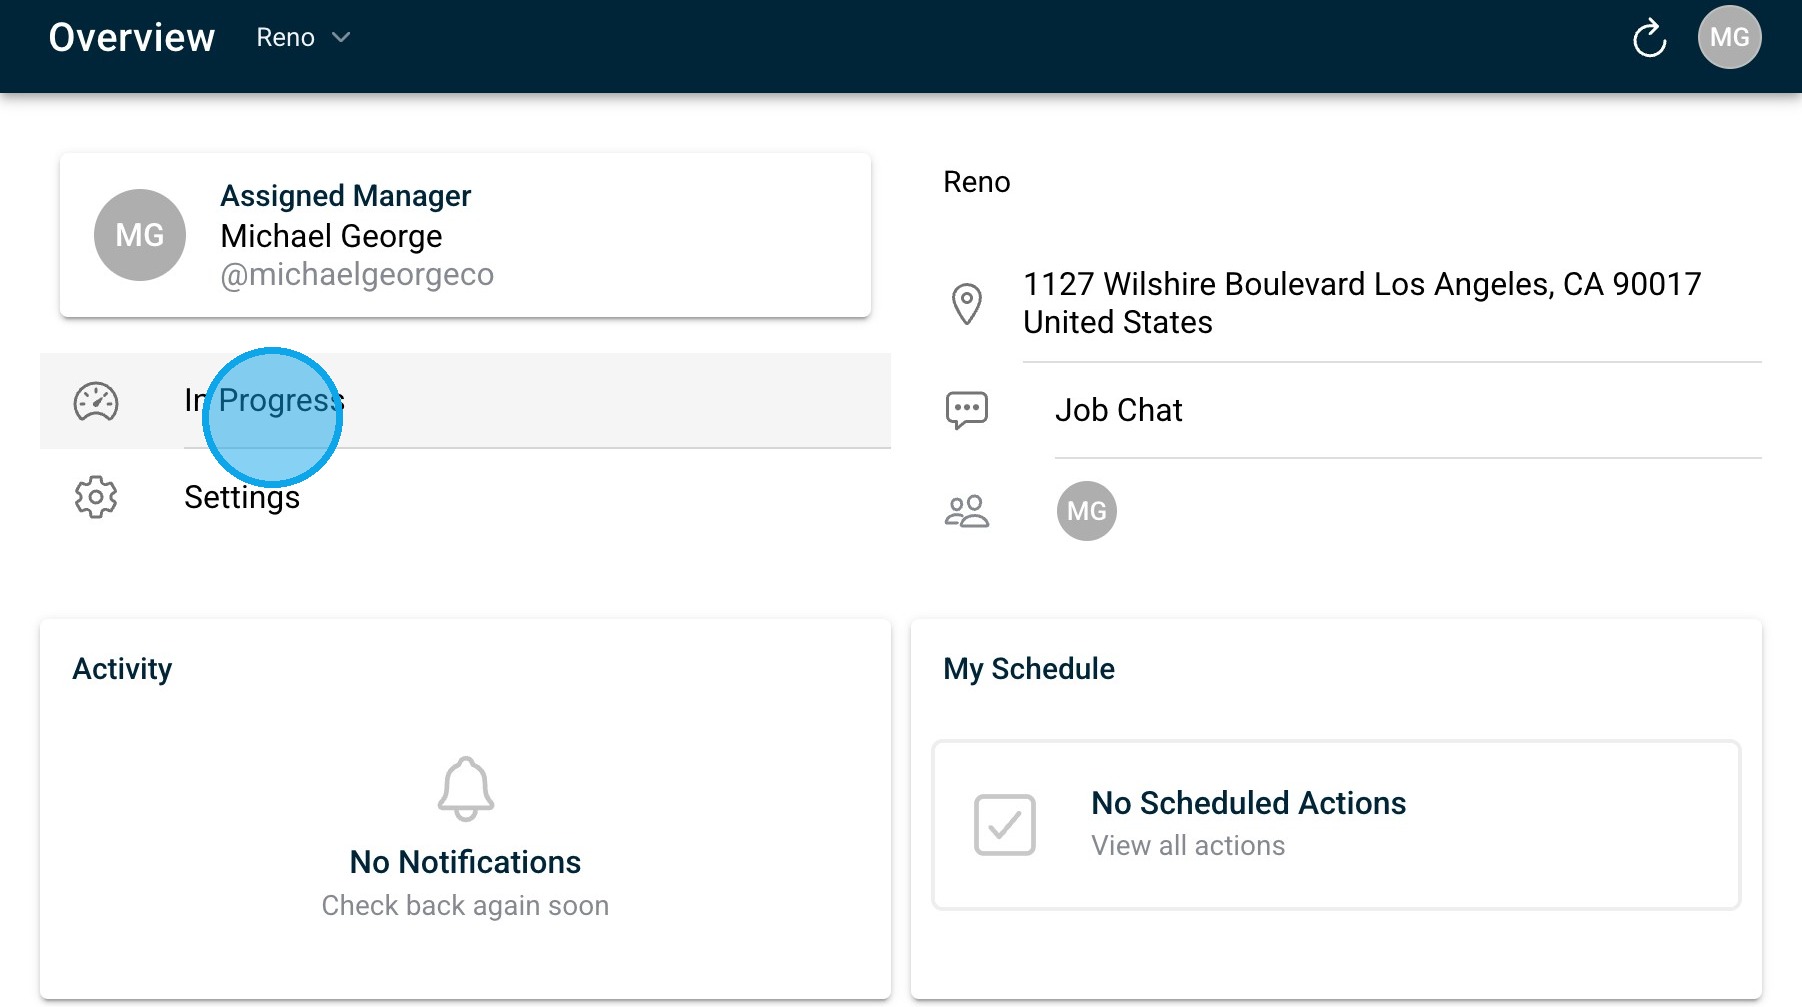
Edit Project Status
○ You can edit the status of your Project then use the filter options back at the top of the Projects section to sort by tags, status, or date; create custom groups if available in your role.
-

Group or Filter Projects
○ Use the filter options at the top of the Projects section to sort by tags, status, or date; create custom groups if available in your role. Click "Filters" Click "Planning"
Confirmation
“You’ll know it worked when your Projects list refreshes with updated location types, statuses, and filtered/grouped results matching your selections.”
FAQ
Q: Why can’t I see the status or location type field on some projects? A: You may lack edit permissions for that project; only admins or project managers can usually change these fields.
Q: Do filters save for everyone on the team? A: No, filters are personal and reset when you log out or switch devices unless you save a custom view (if available).
Q: What happens to archived projects in filters? A: Archived projects are hidden from the main list by default but can be shown using the “Show Archived” filter option.
Q: How do I remove a filter I applied? A: Click Clear Filters or the X next to each active filter at the top of the list.
Related Articles
- Project Access Explained
- Navigate Your Projects
- What Is My Workspace?
- Learn the Project Dashboard
- How to Create a New Project
Find Projects (Search & Filters)
Summary
This tutorial explains how to use filters to sort and group your projects by status, tags, or date in BuilderPal. It helps you quickly find and organize relevant projects for efficient workflow management.
Prerequisites
- Role or permission needed: Any team member with access to projects (e.g., Admin GC, Team Project Manager, Team Member).
- Any setup required: Log in to BuilderPal and navigate to the Projects section.
Steps
1. Access the Projects List
- From the main dashboard, click the Projects tab in the sidebar to view all your accessible projects.
- Insert immediately after the step to show the UI.
2. Open the Filters Menu
-
Click Filters at the top of the Projects section to open the filtering options.
-
Select criteria like status (e.g., Planning), tags, or date ranges, then click Apply to sort and group the list.
FAQ
Q: What should I do if the dashboard doesn't load? A: Ensure you're logged in with the correct credentials and have internet access. Try refreshing the page or switching devices.
Q: Can I customize the dashboard view? A: Yes, use filters and settings in the overview and tasks sections to personalize what data is displayed based on your role.
Q: What if I don't see certain sections like Bids or Timesheets? A: This may depend on your role permissions; contact your admin to grant access if needed.
Q: Do filters stay in place if they aren't custom? A: No, non-custom filters in BuilderPal are personal and do not stay in place—they reset when you log out, refresh the page, or switch devices. To persist them, save as a custom view if the feature is available in your role.
Tips
- Pro tip or best practice: Combine multiple filters (e.g., status + date) for more precise results, and use custom groups to save common views.
- Shortcut or time saver: Use the search bar next to filters for keyword-based quick filtering without opening the menu.
Related Articles
- Organize Your Projects
- Navigate Your Projects
- Project Access Explained
- Learn the Project Dashboard
- How to Create a New Project
Internal Projects
Learn how Internal Projects work in BuilderPal — when to use them, how they differ from full construction projects, and how your team can track internal work, documents, and actions in a simplified workspace.
What Are Internal Projects?
Summary
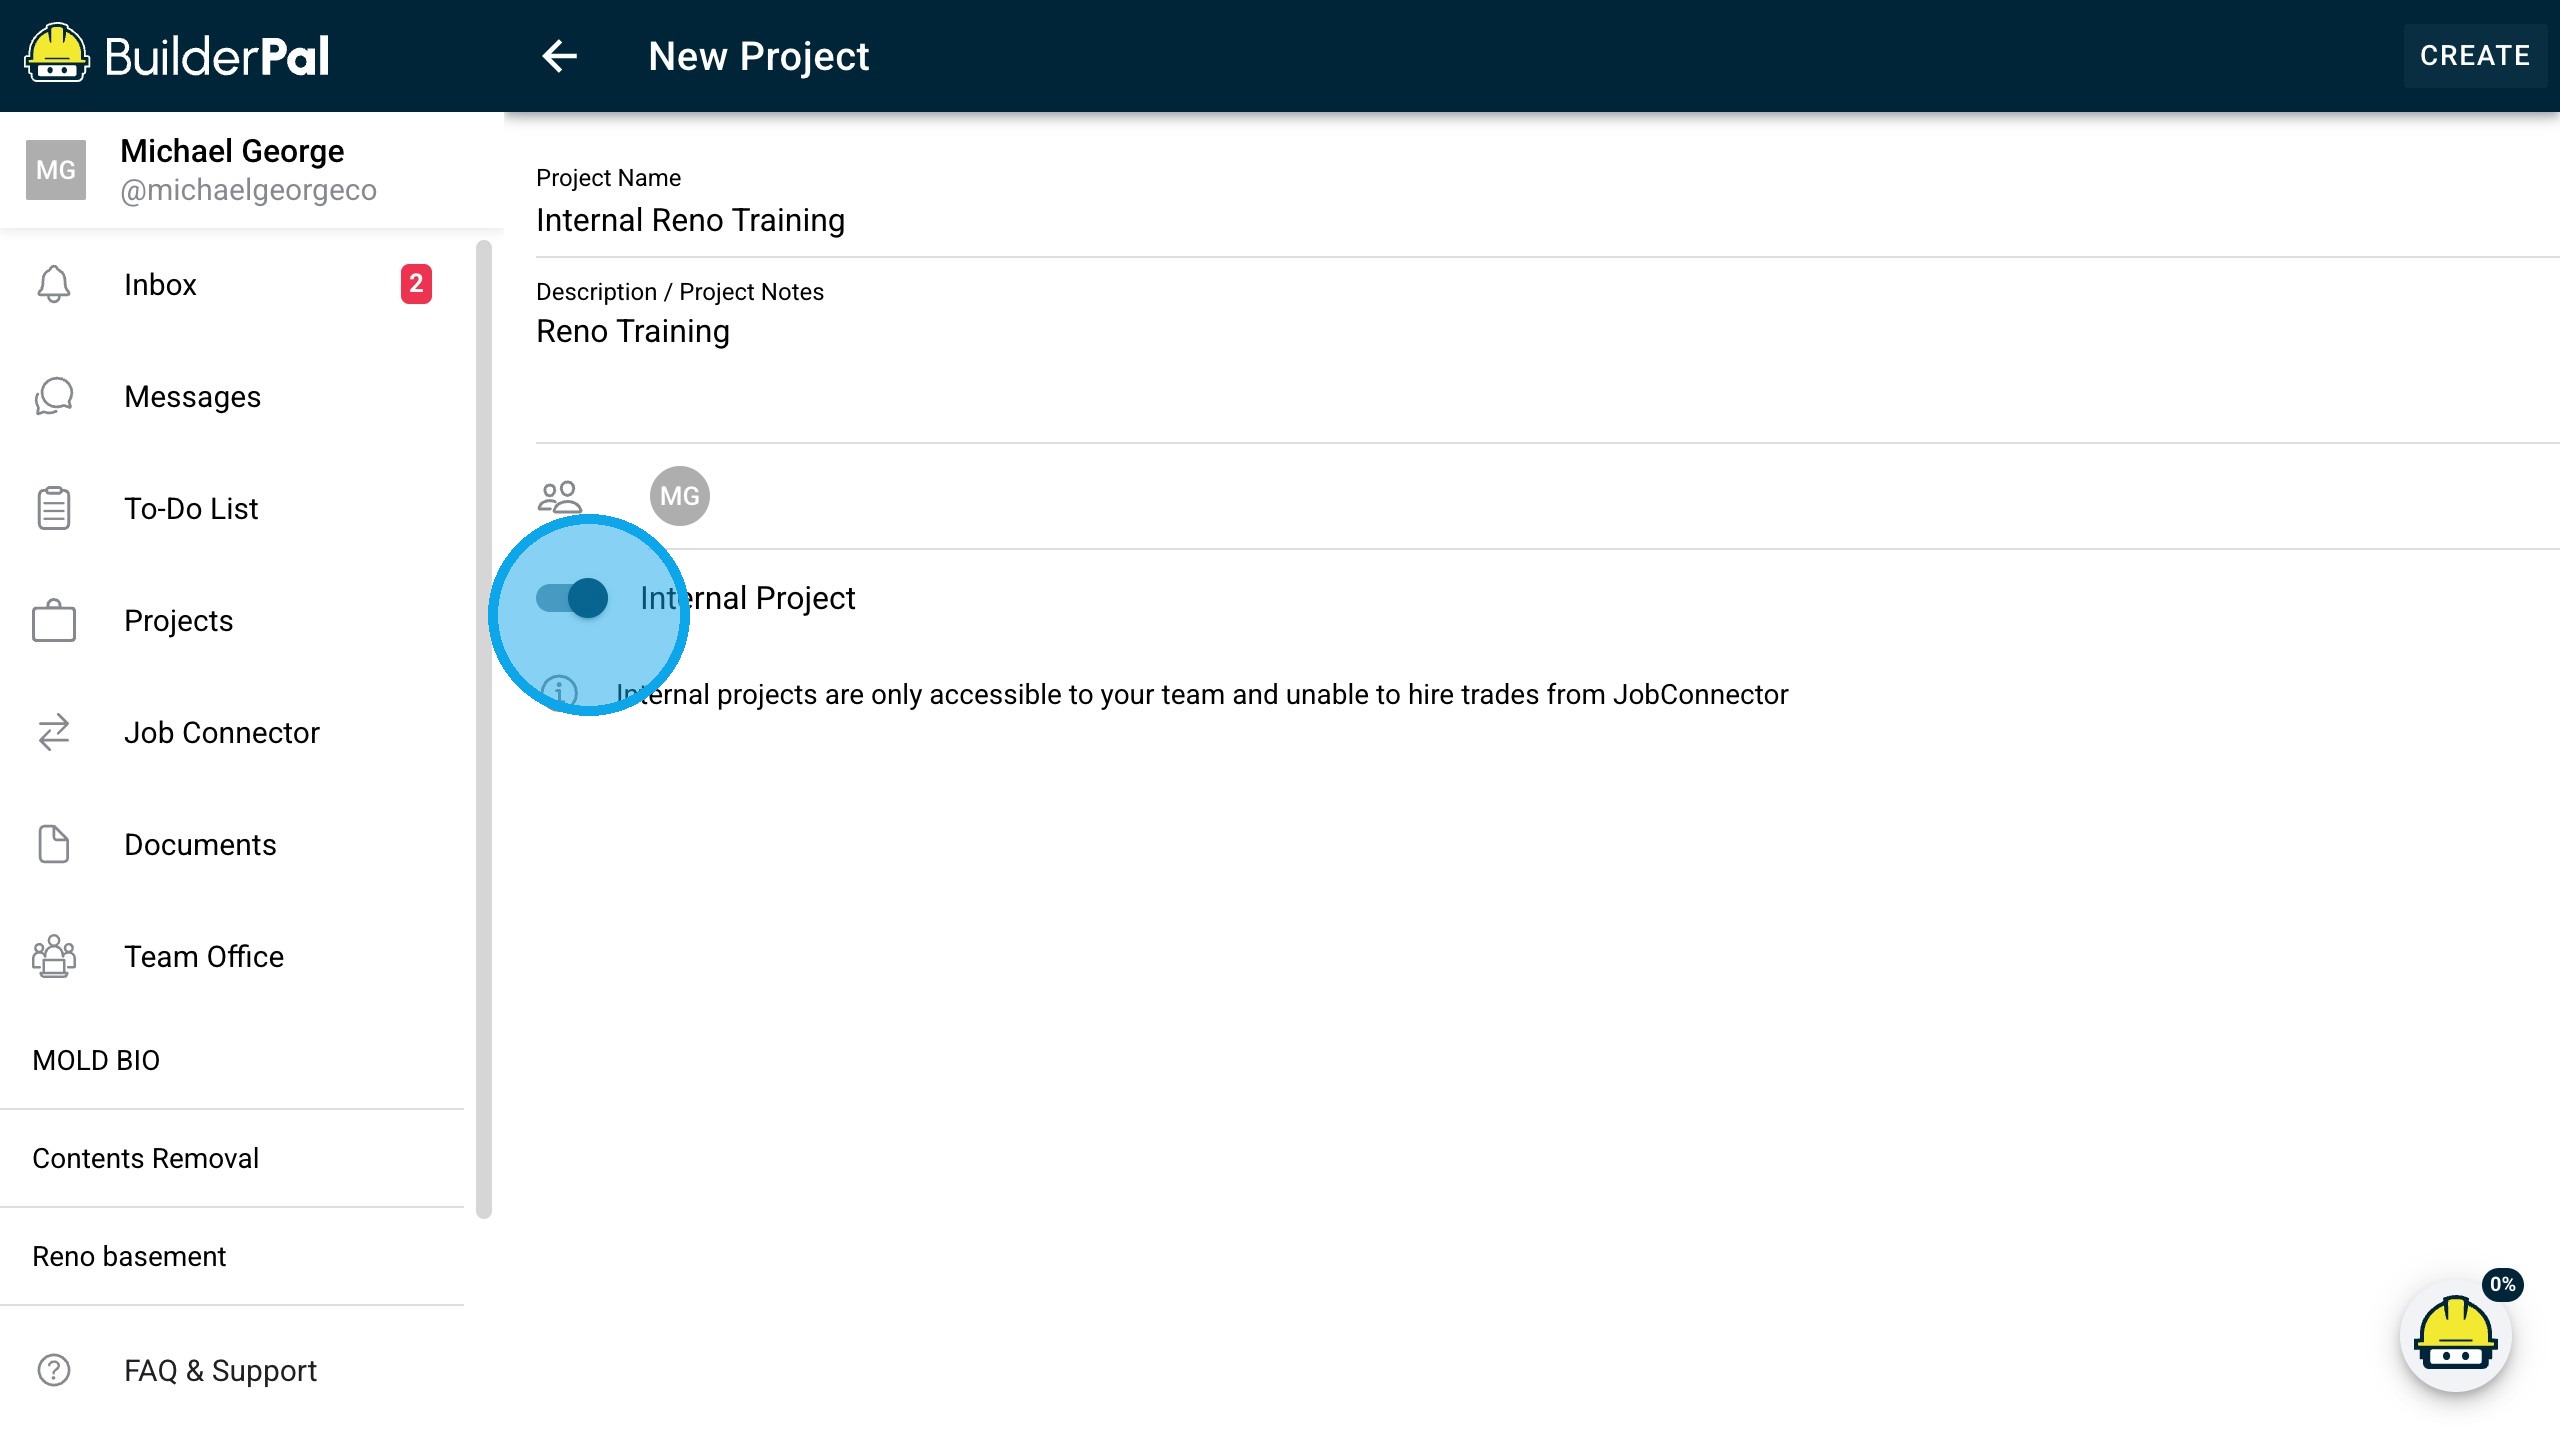
Internal projects in BuilderPal are private workspaces for your team’s internal use, such as company operations, training, or non-client jobs. They allow secure collaboration without external sharing.
Prerequisites
- Role or permission needed: Admin (GC), Admin (SUB), Admin (SHORTCUT), Team Project Manager, or Team Business Manager.
- Any setup required: Log in to your BuilderPal account.
Steps
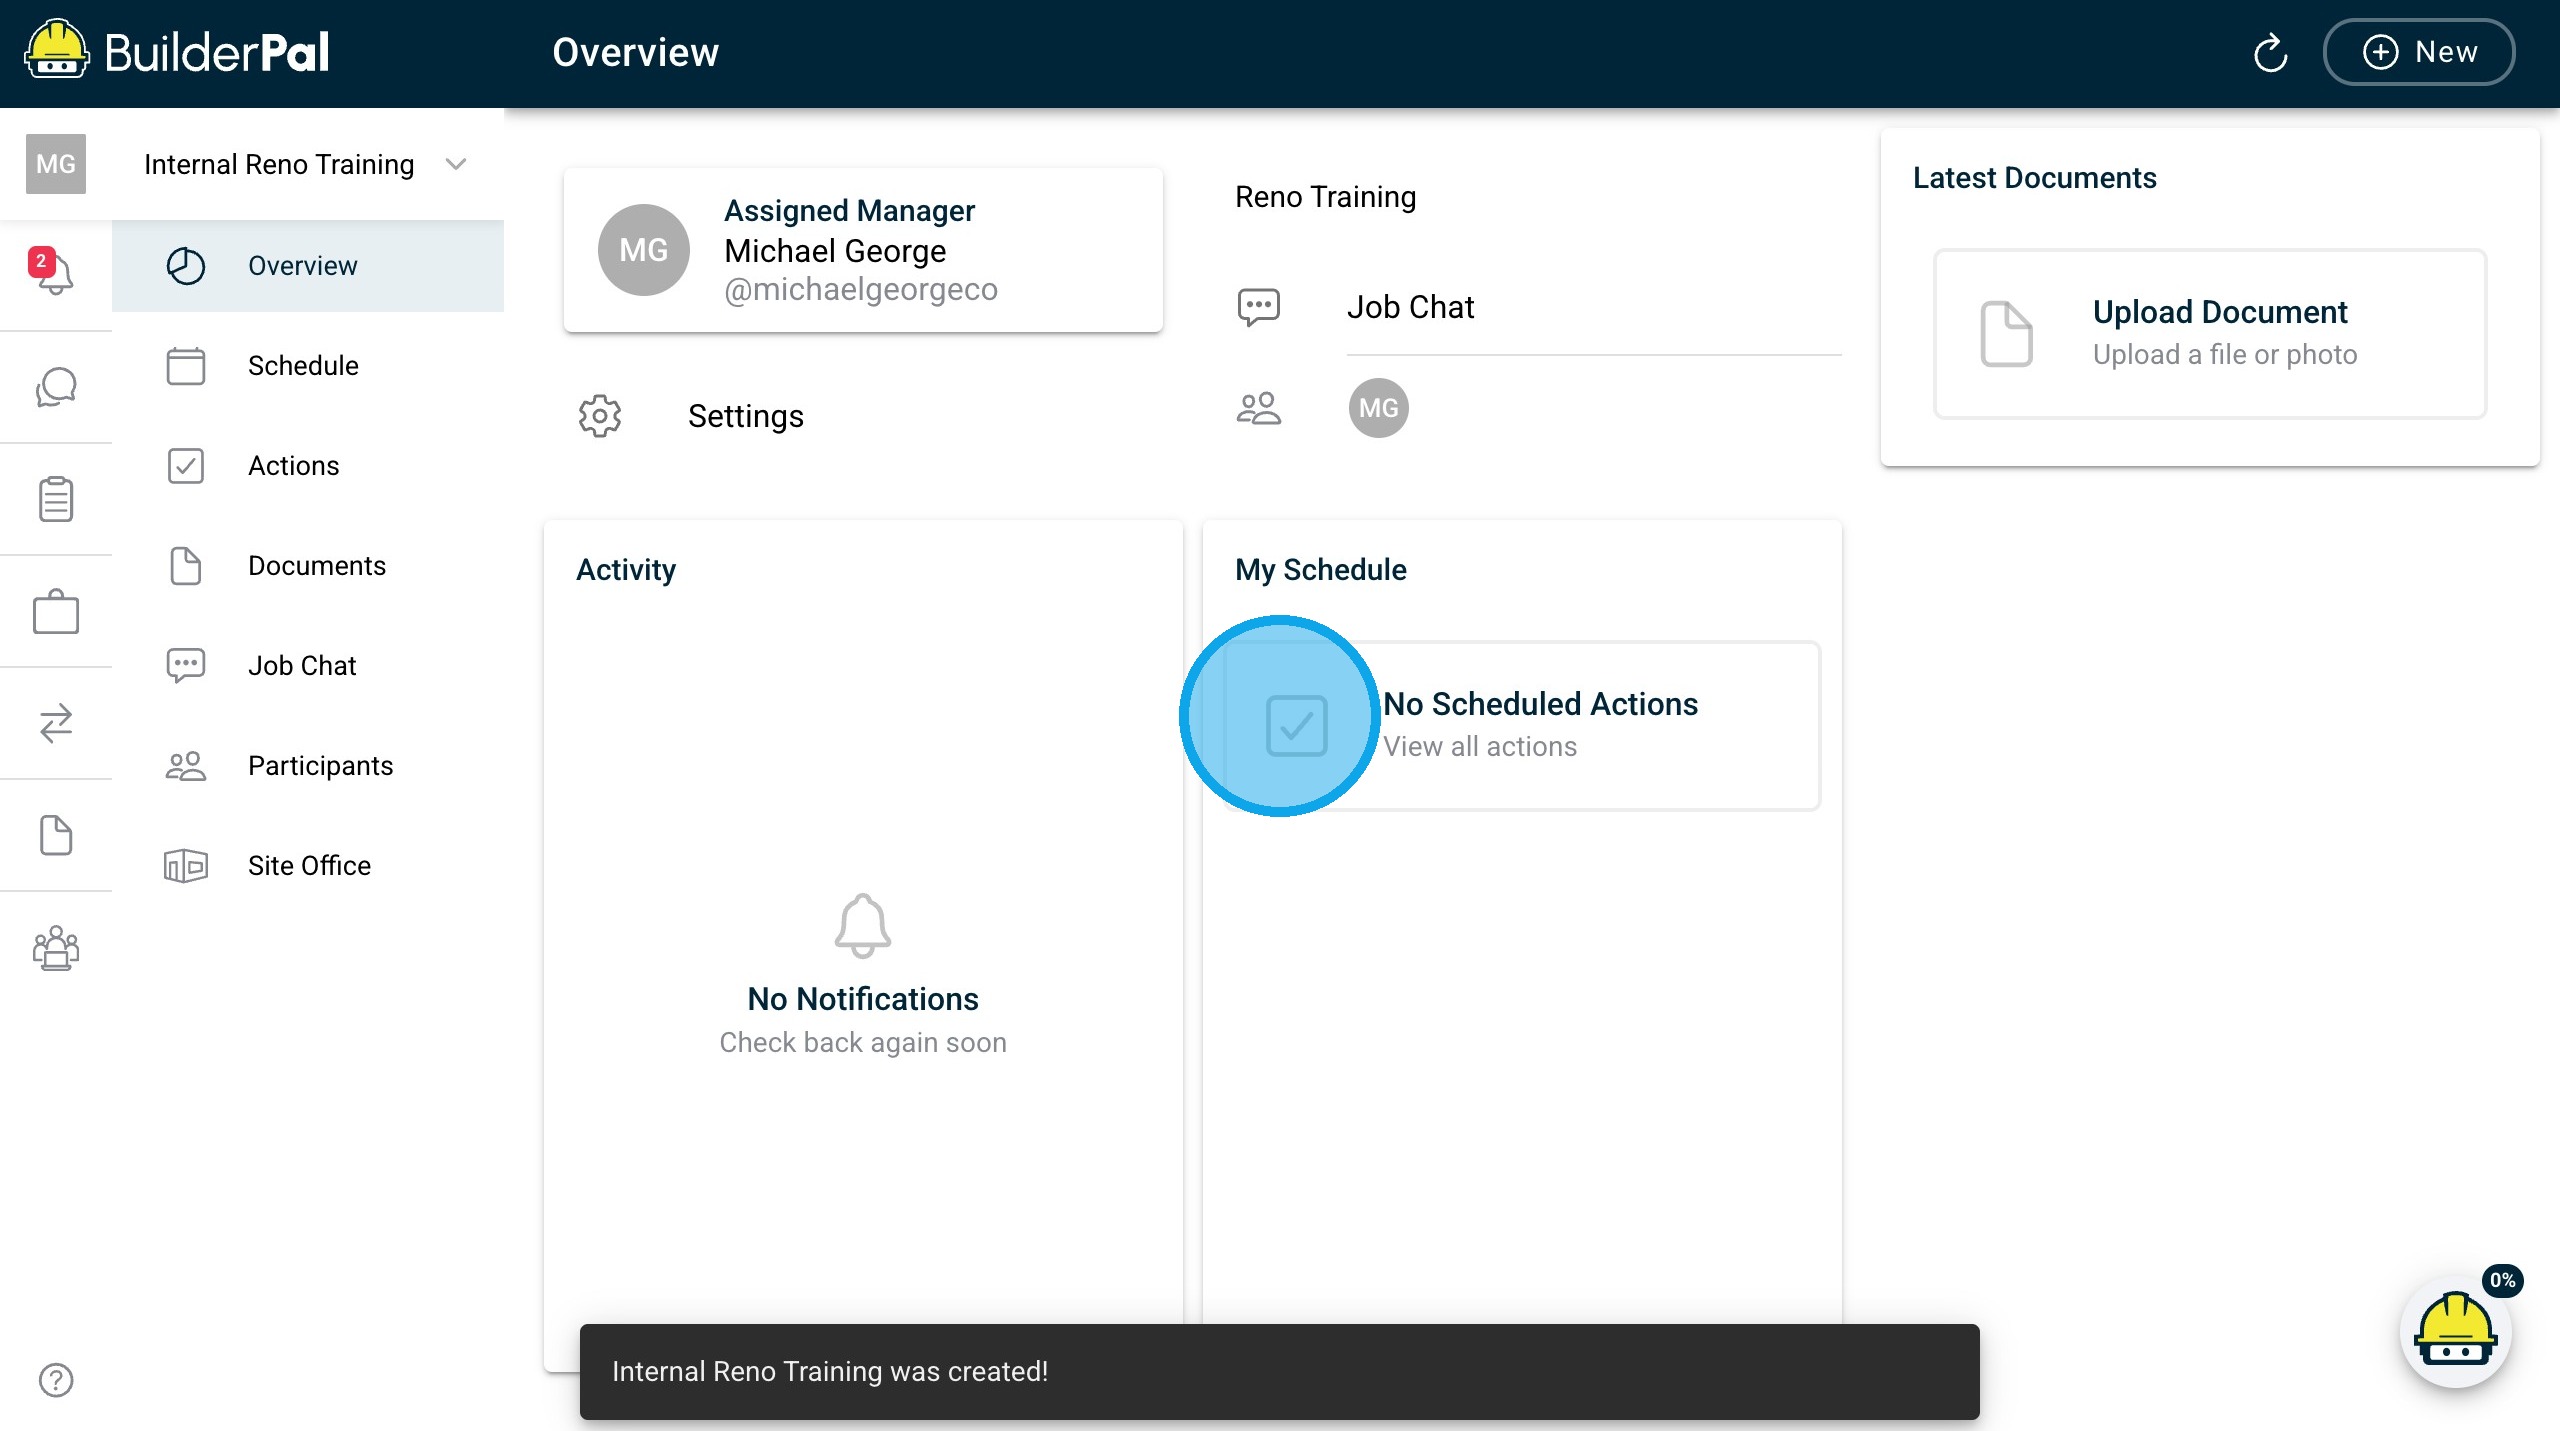
1. Open the New Project Form
- From the Projects Menu, click New in the top right to start creating a new project. Enter your Project name and description.
2. Turn Internal Project On
- This toggle will be located underneath the description.
3. Create the Project
- Click Create in the top right to finish setting up the internal project.
Tips
- Pro tip or best practice: Use internal projects for non-client work to keep internal operations, training, and admin tasks separate from customer jobs.
- Shortcut: Duplicate an existing internal project template to avoid re-entering common details.
Related Articles
- How to Create a New Project
- Project Access Explained
- Manage Project Participants
- Navigate Your Projects
- Organize Your Projects
How Internal Projects Differ From Regular Projects
Summary
Internal projects in BuilderPal are private, team-only workspaces for non-client tasks like training or internal operations, while regular projects are designed for client-facing construction jobs with features for subcontractor collaboration and bidding.
Why it Matters?
Internal projects keep team operations secure and organized, reducing risk, while regular projects enable efficient sub bidding and sharing without full access.
Related Articles
- Internal Projects
- Workflow / Tutorial: How to Create a New Project
- Reference: Project Access Explained
- Troubleshooting / FAQ: Project Visibility Issues
Managing and Working Inside an Internal Project
Summary
This tutorial covers how to manage and collaborate inside an internal project in BuilderPal, including adding participants, assigning tasks, and using core tools. It's useful for team-only workflows like training or operations, keeping data private from clients or subs.
Prerequisites
● Role or permission needed: Admin (GC), Admin (SUB), Admin (SHORTCUT), Team Project Manager, or Team Business Manager.
● Any setup required: Log in to BuilderPal and have an internal project created (see related articles for creation).
Steps
-
Open the Projects Menu
Click on your internal project to open it. In the project dashboard, you can add Participants, search for team members, assign roles, and save to add them.
-
Assign Tasks
○ Instruction: Go to Actions or Tasks section, click Add Action, enter details, assign to team members, and save.
○ Screenshot: Only if not obvious.
-
Upload Documents
○ Instruction: Navigate to Documents, click Upload, select file, and add to share with the team.
○ Screenshot: Only if not obvious.
-
Use Job Chat
○ Instruction: Click Job Chat to start discussions, create channels, and collaborate in real-time.
○ Screenshot: Only if not obvious.
Confirmation
“You’ll know it worked when the internal project updates with new participants, tasks, documents, and chat messages visible only to your team.”
Tips
● Pro tip or best practice: Use internal projects for sensitive team data to avoid accidental sharing with clients.
● Shortcut or time saver: Duplicate tasks or documents from other internal projects to speed up setup.
Related Articles
● Concept Overview: What Are Internal Projects
● Workflow / Tutorial: How to Create a New Project
● Workflow / Tutorial: Manage Project Participants
● Workflow / Tutorial: Managing Project Tasks
● Concept / Overview: Project Lifecycle Overview
● Reference: Project Access Explained
My Workspace
Discover how the My Tasks Workspace helps you manage your personal actions across all projects — a focused, lightweight dashboard designed just for your own tasks, notifications, and documents.
What Is My Workspace?
Summary
Your Workspace in BuilderPal is your company's dedicated hub where you manage projects, teams, and settings. It acts as the top-level container for all your construction projects and resources.
Workspaces keep your company's data organized and secure, allowing multiple users to collaborate without mixing with other organizations. It simplifies admin tasks like permissions, billing, and custom configurations.
How It Works
A Workspace is created when you sign up for BuilderPal and represents your business entity. Within it, you can create projects, invite team members, set roles, and access shared tools like templates and reports. Data is isolated per Workspace for privacy.
When to Use
Use your Workspace for company-wide setup, such as adding users or configuring defaults, before diving into individual projects. Switch Workspaces if you manage multiple companies.
FAQ
Q: How do I switch between multiple Workspaces? A: From the main menu, click your profile icon and select "Switch Workspace" to choose another one you're part of.
Q: Can I rename my Workspace? A: Yes, admins can edit the Workspace name in the settings under "Company Profile."
Q: What happens if I delete a Workspace? A: All associated projects, data, and users will be permanently removed; contact support first for backups.
Q: Is there a limit to the number of projects in a Workspace? A: No strict limit, but performance may vary with very large numbers; scale as needed.
Q: How do permissions work at the Workspace level? A: Workspace admins control global settings and can assign project-specific roles to users.
Related Articles
- Create Team Members
- Create Your First Project
- Manage Your Personal Tasks in My Workspace
- Learn The Project Dashboard
What Is My Workspace?
Summary
Your Workspace in BuilderPal is your company's dedicated hub where you manage projects, teams, and settings. It acts as the top-level container for all your construction projects and resources.
How It Helps
Workspaces keep your company's data organized and secure, allowing multiple users to collaborate without mixing with other organizations. It simplifies admin tasks like permissions, billing, and custom configurations.
How It Works
A Workspace is created when you sign up for BuilderPal and represents your business entity. Within it, you can create projects, invite team members, set roles, and access shared tools like templates and reports. Data is isolated per Workspace for privacy.
When to Use
Use your Workspace for company-wide setup, such as adding users or configuring defaults, before diving into individual projects. Switch Workspaces if you manage multiple companies.
Next Steps
Once familiar with your Workspace, create your first project or invite team members to get started.
FAQ
Q: How do I switch between multiple Workspaces? A: From the main menu, click your profile icon and select "Switch Workspace" to choose another one you're part of.
Q: Can I rename my Workspace? A: Yes, admins can edit the Workspace name in the settings under "Company Profile."
Q: What happens if I delete a Workspace? A: All associated projects, data, and users will be permanently removed; contact support first for backups.
Q: Is there a limit to the number of projects in a Workspace? A: No strict limit, but performance may vary with very large numbers; scale as needed.
Q: How do permissions work at the Workspace level? A: Workspace admins control global settings and can assign project-specific roles to users.